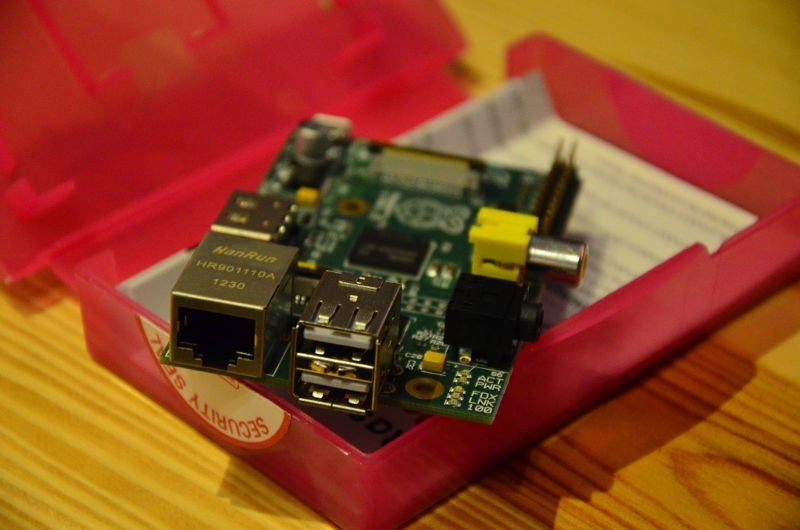
There’s no doubt that non-profit organization behind http://www.raspberrypi.org/, the $25 computer (well let’s just say $35 + some xtras) had a huge success and is the next big thing for every computer enthusiast. Raspberry Pi is a full blown computer based on the ARM architecture that allows to run different sorts of operating systems.
Let's start!

Today we have a plethora of Linux distributions to choose from, and the one to start and one to stay with is the Raspbian, based on another famous Linux distribution – the Debian. This little computer is designed in a very smart way allowing you to display video both on Composite only monitors (just back when I had Atari ST in the ’90, and every other Atari/Amstrad/Commodore C4 or Amiga) but also HDMI output, that you can optionally configure to work with any screen. Most HDMI->VGA converters do also work just fine. Raspberry Pi is now shipped in few variants – the classic 512MB RAM in model B is only available as used (just as the A model, that lacked Ethernet port), but previously they had – A i B just 256MB RAM. Today as of 2015 we have still B+ and A+ models – redesigned to allow better power management and distribution as well as the factor of outputs. The flagship today is of course the Raspberry Pi 2 and 3 – 1GB RAM, four cores and backward compatibility, while the version 3 has also WiFi and BLuetooth (LE) onboard, and the cores have been updated to A53 1,2GHz, 64-bit. To continue the sound is also being transferred over HDMI, which allows for decoding – but also you can choose analog (it’s on the jack along with composite video). For multimedia player enthusiast – this device is AVC hardware-decoding capable – way up to 1080p with sound – but there’s not default MPEG-2 license – you can order it separately. The original A, A+, B and B+ had a CPU horsepower comparable to old Pentium II 350MHz, but don’t forget that GPU is 1080p capable. Just to start Raspbery Pi offers:
multimedia player based on XBMC – KODI. It’s also capable to achieve the ultimate lightning effect: Light effect for Rasberry Pi
- a way to play Minecraft – http://pi.minecraft.net/ for free
- great platform for SDR – Software Defined Radio, check the entry about it: SDR using Raspberry Pi to get you flightradar.com-like output
- fantastic way to start learing Python: http://python.org/
- Home Automation System, with Z-Wave, relays, external slaves on ESP8266: Domoticz with Z-Wave and ESP8266 o HomeAssistant with ESPHome
Powering the Raspberry Pi
You will need of course the Rasbperry Pi hardware – either old A i B or newer B+ and version 2. I would recommend to start with Model B+ since it has FastEthernet and better power management. You can buy them from official shops like RS or Farnell both good choices. Apart from that we will need:
- Power supply – 5V, 2000 mA with micro-USB connector
- MicroSD card (older models use SD card format) – minimum is 4GB, but I recommend 8GB. Beware of counterfit microSD cards, use at least Class 4
- Ethernet cable connected to home router – that has DHCP. You could start with monitor and keyboard, but that’s not really the way we deal with Pi
Optionally
- HDMI or Composite to connect to monitor or TV. Pi when started will try to obtain IP address via DHCP, so monitor is optional – yet you can read the result
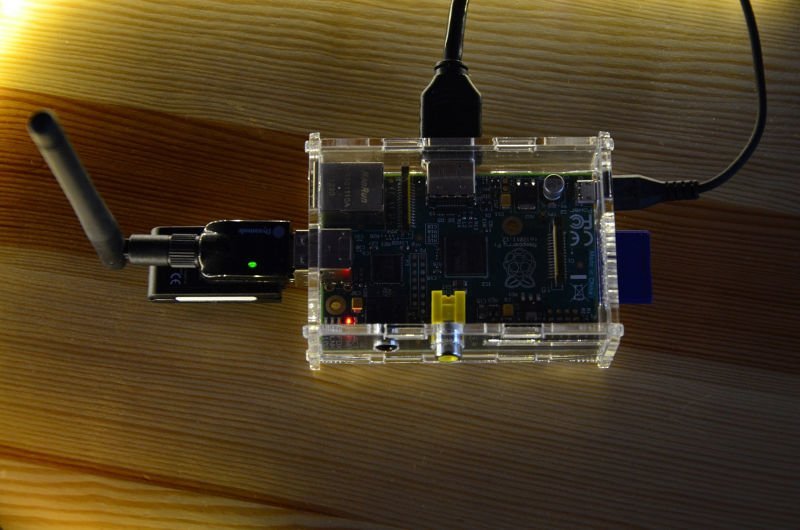
- chassis – Pi is barebone so to protect from unwanted ESD or just simple short-circut – use a ready or 3D printed chassis.
- Audio cable and speakers
- USB keyboard and mouse
- USB WiFi dongle for any Raspberry Pi lower than version 3B+ and for Zero without built-in WiFi chip
Raspbian or Raspberry Pi OS install
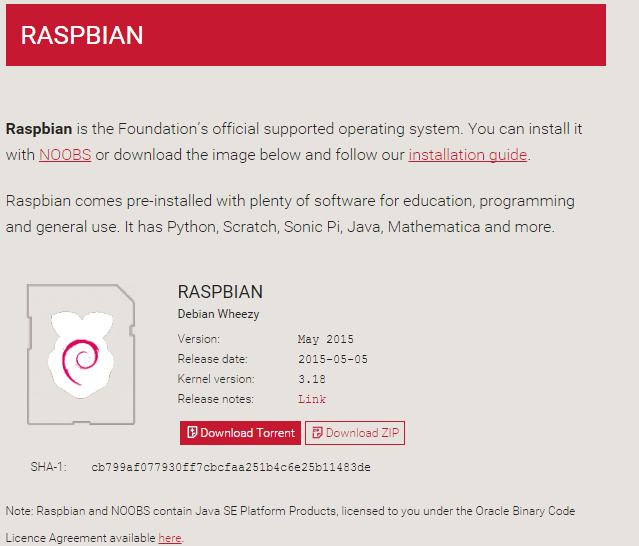
Let’s install Raspbian! Download form https://www.raspberrypi.org/downloads/raspbian/ ZIP...

with the image of distribution for Raspberry Pi. After unpacking for Windows: put a micro SD into card reader and find new drive in Explorer:

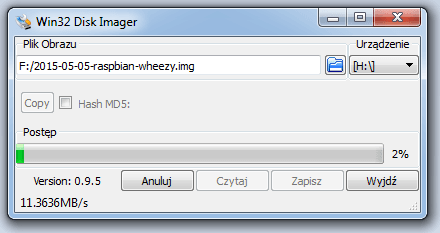
Next run Win32diskimager, open our image and choose Save:

After few minutes the image is ready. Remove safely the card and insert into Raspberry Pi. After hooking up keyboard and monitor – power it on and observer how Pi boots. After it boots you can use keyboard and monitor to log in or if you already have IP address on the box – using ssh – user pi, password raspberry. System will display few options – one of the most important is the expading of the filesystem on the card – image has only 2GB and uses only 2GB on i.e. 8GB card. Chose “1. Expand Filesystem”, and allow reboot!
You will see after 30secs the IP address on the screen or you can find it out in home router logs. On keyboard – login using user pi and password raspberry – you should see: pi@raspberrypi ~ $. You might also boot straight into X – which is the graphical UI of the Rasbian – but if you’re stuck in ‘text’ mode – type startlxde – it looks kinda like Windows 95 and little less like Windows 7.

Congratulations, you’ve just started your Pi!
Next steps
If you’re an avid Linux user, you’ll just feel at home, but if you’ve never used UN*X but only MS Windows – use those two pieces of software:
Filezilla
Filezilla is an Open Source software, used to transfer files – and it has a perk of using SSH (SFP). Remeber taht SSH needs to be enable first, take a peek at next paragraph. SSH file transfer is very similar in operation to well known FTP, but it’s much safer, and uses encrypted channel. So you get two-in-one – ability to log in remotely via SSH and transfer files. You can get it from https://filezilla-project.org/, and to start all you need is IP address of your Raspberry Pi (when using console – use sudo ifconfig eth0 – to find out what is your Ethernet IP address or sudo ifconfig wlan0 if connected via WLAN), user pi, password raspberry and the port is 22. Just after logging in you will see the files in /home/pi folder.
Console - SSH terminal – putty
Putty is another free software used on MS Windows to connect via ssh protocol to remote or local systems. It’s a simple EXE file from: http://www.chiark.greenend.org.uk/~sgtatham/putty/download.html. First you need to enable and start is – so leet’s get back fo a bit to the keyboard and screen console and type
sudo systemctl enable ssh
sudo systemctl start ssh
Now get back to big PC – enter IP address of your PI, choose SSH, when asked login: pi, then password: raspberry. And there you are just like on monitor and keyboard – using Raspberry Pi!

This work is licensed under a Creative Commons Attribution-NonCommercial-NoDerivatives 4.0 International License (c) 2014-2024 Łukasz C. Jokiel, [CC BY-NC-SA 4.0 DEED](https://creativecommons.org/licenses/by-nc-sa/4.0/)