Light effect for Raspberry Pi based media players – Raspbmc/Openelec/Libreelec
Raspberry Pi can be easily used as media player. We can choose from many variations, but the one I’d like to focus on is Raspbmc based on XBMC. Raspbmc with hyperion has ability to drive RGB LED strip or daisychain using Raspberry Pi. The important part is that it will lit the RGB LEDs accordingly to the screen borders in realtime. It’s used to make the visible part of the picture more vivid and extend it beyond the display, and it’s simply quite cool:
So, the effect is interesting, but … it doesn’t bother you ? Will my eyes hurt, or am I going to be distracted by it ? What about fast changing scenes ? Well in fact – no worries, you’ll forget about it in 5 minutes, mostly becasue it effects only perephrial vision. Try it out yourself! As it turns out it’s very important to use original Pi board, since Piotr (more in comments) had bad experience with clones – there’s no communication with LEDs!
Let’s begin, our system will not require any soldering!
Bill of material
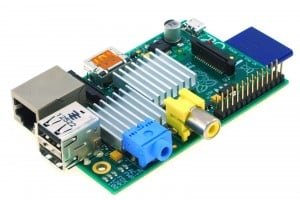
- 1 piece of Raspberry Pi 2,3 or 4B:
- 10 jumper cables that fit PINs in Raspberry Pi, you’ll need two male-female and two female-female ones:

- 1 power source 5V 2 to 6A based on the length and type of LED strip. It’s going to power both LED strip and Raspberry Pi.
- 1 socket with ability to fit the power source and attach jumper cables:

- 1 piece of RGB LED strip with WS2801 chip or other form of RGB LED WS2801 enabled “x-mass liights”. 2 meters strip will fine for 24-36″ TV, while 3 metrs will last for 42-46. You might also find strips using GRB configuration, as one of the commenter noticed – software can also support such configuration – see the Software section and HyperCon
- If you would like to use christmass tree decoration LED strip - check the manual
Connecting
CAUTION: RGB LED strip with WS2801 chips is powered via 5V power supply (PSU) and usually will need about 7 Watts per meter, so be very carefull when calculating the PSU! We’re going to connect power for Raspberry Pi using it’s PIN – not via USB. Why ? Most of the problems with strip comes when using separate PSUs and it also allows to use just one powerfull PSU, without worrying about USB cable with thin lines. But the downside is that we will be bypassing the internal fuse in Raspberry Pi, so choose a very stable PSU!
Should you choose strip or xmass lights ? Each have pros and cons, but let’s deal with that later.
Lets start by preparing our power socket for connection to RaspberryPI and the LED strip:

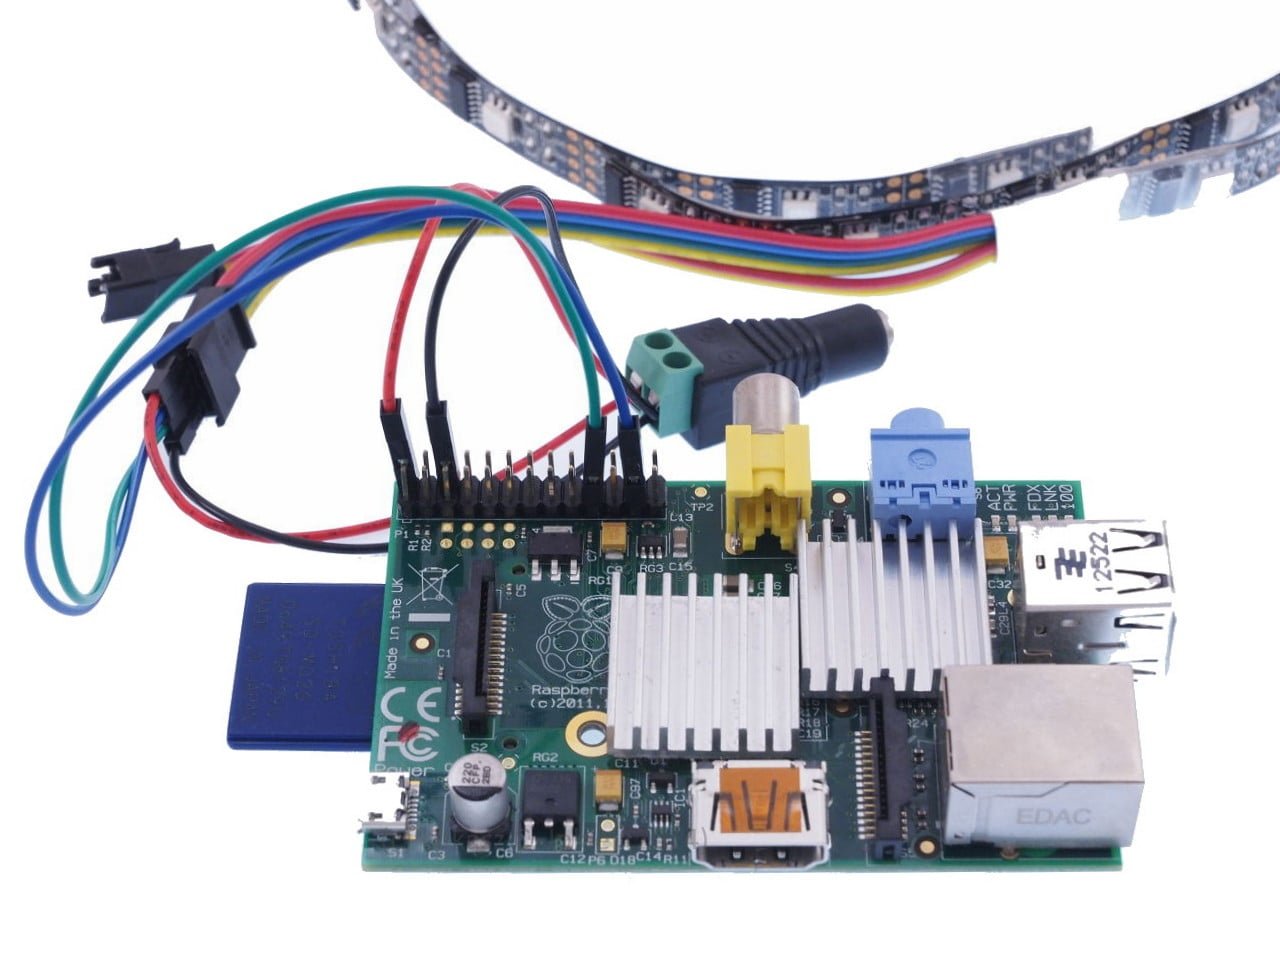
The important step now is to connect data & clock signals to proper end of the strip (look at the arrow):
- PIN 23 – connect to CLOCK on the stip (abbrv. CL)
- PIN 19 – connect to DATA on the strip (abbrv. DO)
- PIN 2 – the +5V – to PSU
- PIN 6 – the GND – to PSU
Let’s properly wire the power to Raspberry Pi:
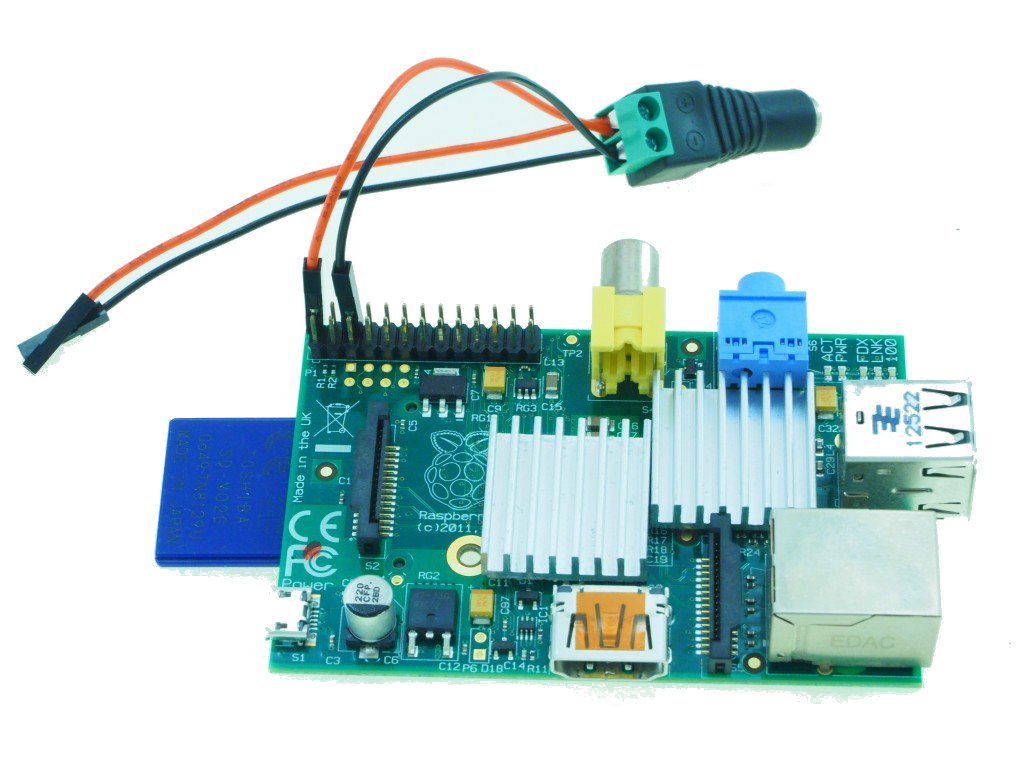
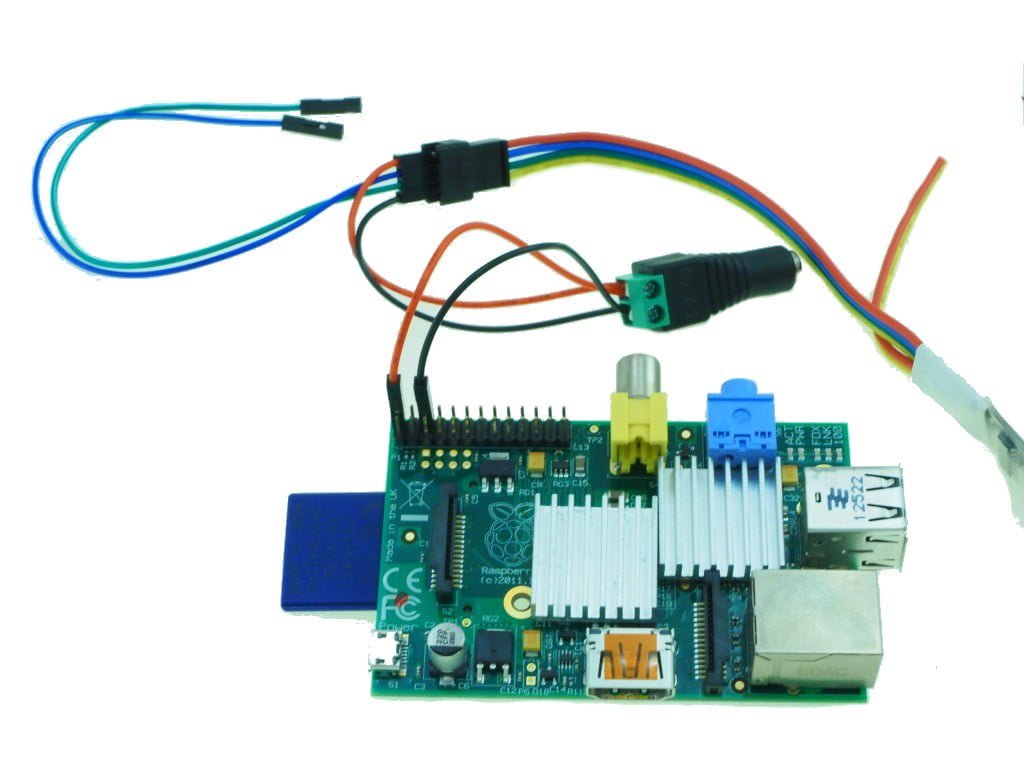
Same wiring for the LED strip:
And finally – clock and data wires connected to LED strip:
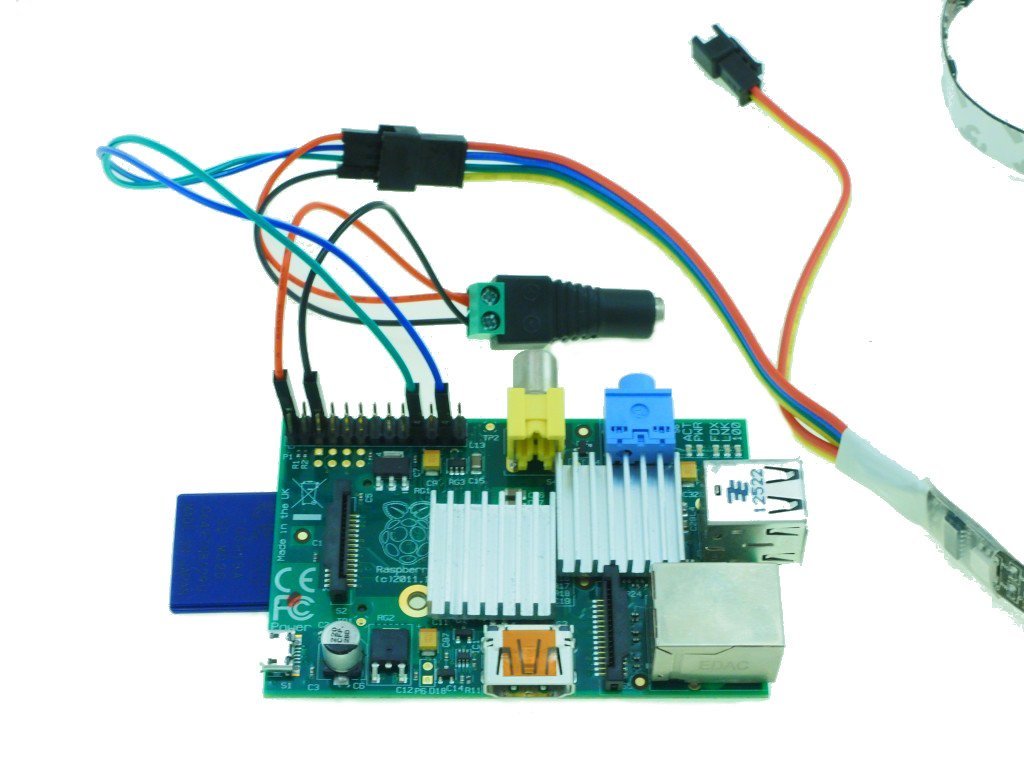
Now STOP: Did you connect the data & clock lines on the correct end of the strip?
Our cabling should looke like this:
Software
aspbmc
Let’s start with raspbmc distribution – first we need to log in via ssh to raspbmc running on Pi. User/password are the same as in default Rasbian distribution pi and raspberry (as of January 2014).
Now let’s prepare to install ‘hyperion’.
Wait, what is ‘hyperion’ ?
Well it turns out that raspbmc already includes the support for RGB LED strips – it’s called ‘boblight’. This is a very well working software, but it happens to be slow – when using more LEDs (i.e. 150 when using 3 meters strip). So let’s replace it by better and faster software – hyperionem.
First of all we need to install proper libraries to build the software:
sudo apt-get update
sudo apt-get install libqtcore4 libqtgui4 libqt4-network libusb-1.0-0 libprotobuf7 ca-certificates
Now let’s turn off boblight:
sudo /sbin/initctl stop boblightLet’s test the connection to the strip – lit some LEDs!
wget -N https://raw.github.com/tvdzwan/hyperion/master/bin/install_hyperion.sh
sudo sh ./install_hyperion.sh
Testujemy podłączenie do taśmy:
hyperion-remote --priority 50 --color red --duration 5000Now all you need to do is to configure hyperion according to your LED positions and quantity and enjoy the view!
Hyperion manual gives us Java program (), get it here:
HyperCon.jar
So it’s quite easy to select proper number of LED, their placement, clockwise orientation, etc. It’s also the place to check right configuration of the color coding on the strip – RGB or GRB.
Leave all other to defaults and save the file as hyperion.conf.json
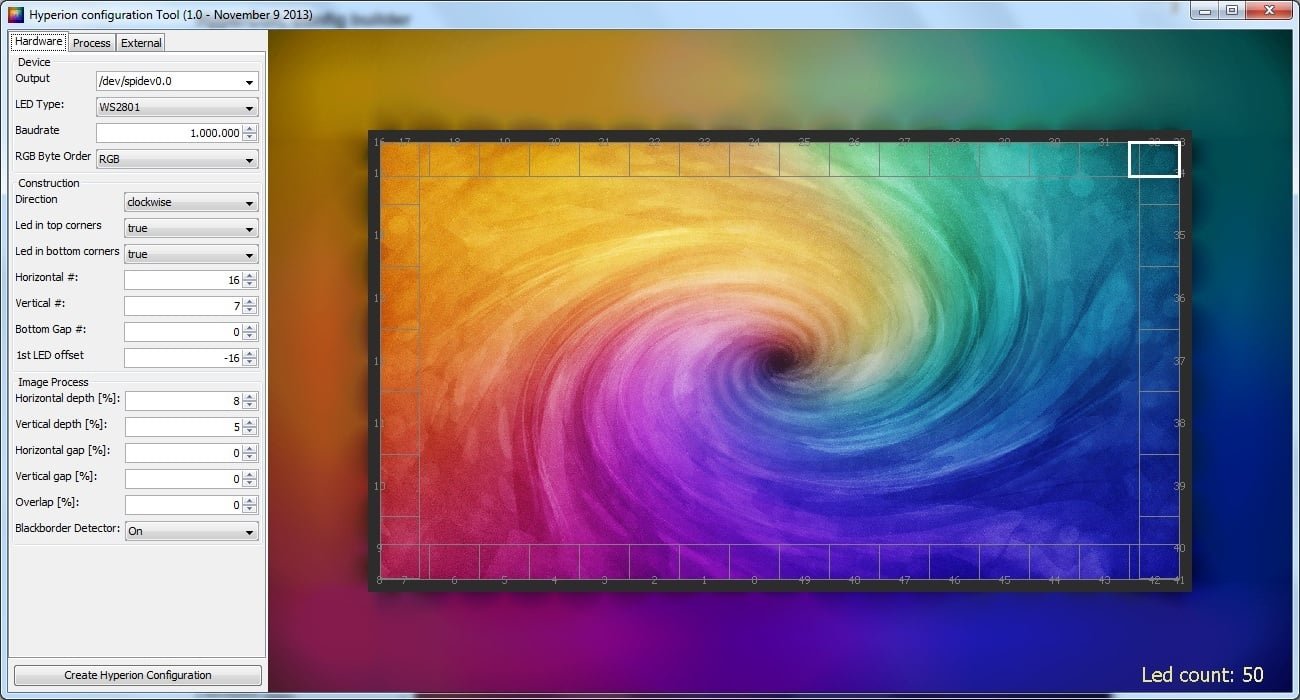
Now using scp or FTP – upload the hyperion.config.json file to Raspberry Pi running RASPBMC. Then, login via ssh onto RASPBMC and issue:
sudo cp hyperion.config.json /etc/hyperion.config.jsonThat’s it!
OpenELEC
Now, OpenELEC is very XBMC-centric distribution, with little overhead of operating system. This comes down to simpler installation, but still I’d like you to go and read the raspbmc paraghraph, as we will need it for configuration.
Hyperion installation is similar, after logging in via SSH – you’ll get direct root access with root password openelec – you need to issue in console:
curl -L --output install_hyperion.sh --get https://raw.githubusercontent.com/tvdzwan/hyperion/master/bin/install_hyperion.sh
sh ./install_hyperion.sh
Next please store your config file here:
/storage/hyperion/effectsHow to uninstall
But what if we would like to return to boblight and uninstall hyperion ?
sudo /sbin/initctl start boblightand:
sudo /sbin/initctl stop hyperion
rm /etc/init/hyperion.config.json

This work is licensed under a Creative Commons Attribution-NonCommercial-NoDerivatives 4.0 International License (c) 2014-2024 Łukasz C. Jokiel, [CC BY-NC-SA 4.0 DEED](https://creativecommons.org/licenses/by-nc-sa/4.0/)