Domoticz cz. 3.1: ESPEasy/ESP8266 – zdalny i lokalny wyświetlacz oled, temperatura, wilgotność, światło – stacja pogodowa
Previously we played around the SSD1306 OLED display as side display for Raspberry Pi. The author of ESP Easy – Richard ten Klooster (https://github.com/ESP8266nu/ESPEasy) – recently updated his project to include new sensors, so today we will update our DHT22 enabled remote sensor for Domoticz with display and light metering. Our weather station will get a remote display.
I’ve created bundle of sensors to allow both temperature and humidity measurement in a small shack for chopped wood - but also to light the way to it after dark via LED lamp. Also I was interested in stability of ESPEasy with DHT22, BH 1750 and OLED I2C display.
What will you need?
Software & Hardware
- ESPEasy running on ESP8266 – best choice is to use the prototype board NodeMCU v2, just like in last example. It’s rock solid so far, partially because good power block – it has uptime of 44591 minutes
- SSD1306 controller based OLED display (or compatible) – again – just like last time when conneting it to RPi
- Temperature and humidity sensor, which we already connected to ESP8266 – DHT22
- OPTIONAL: Light intensity sensor – BH 1750, to be connected in parallel with SSD1306 to I2C bus on ESP8266
Let’s do it!
Connecting the display is very easy – event if you didn’t the previous example for Raspberry Pi. After logging in to ESP – ESPEasy – we choose the PINs that will work as I2C bus. This example uses the default: GPIO 4 & 5. Let’s connect our display to +3,3V, GND, and SDL & SCL to GPIO 4 & 5. The configuration is as follows:
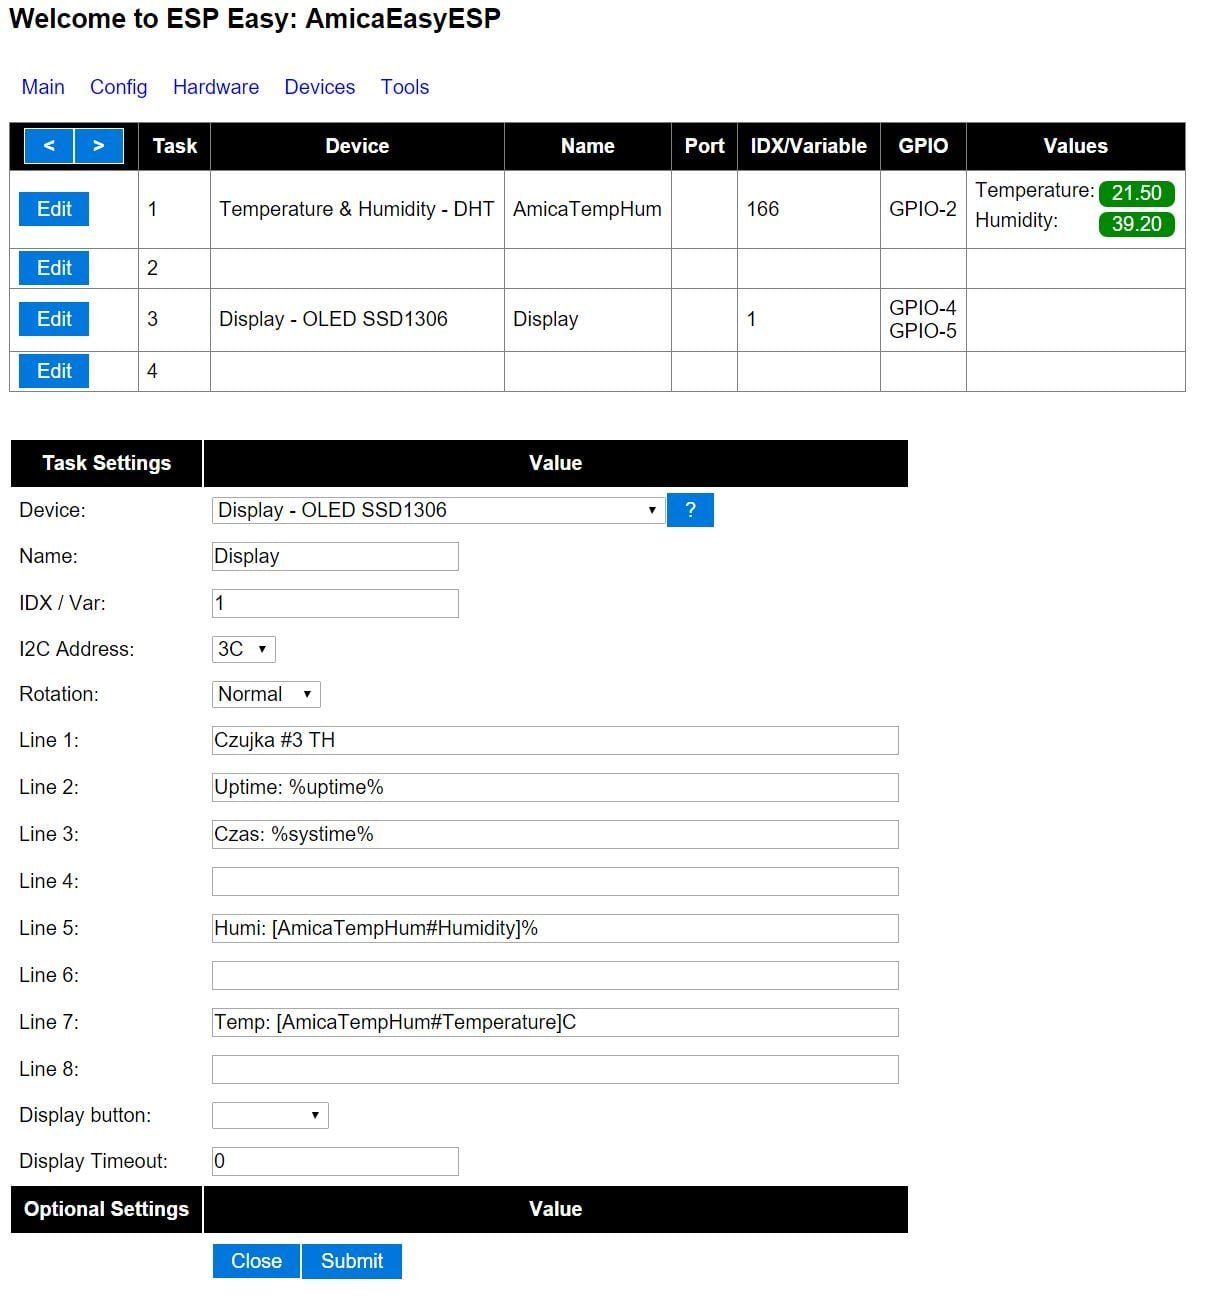
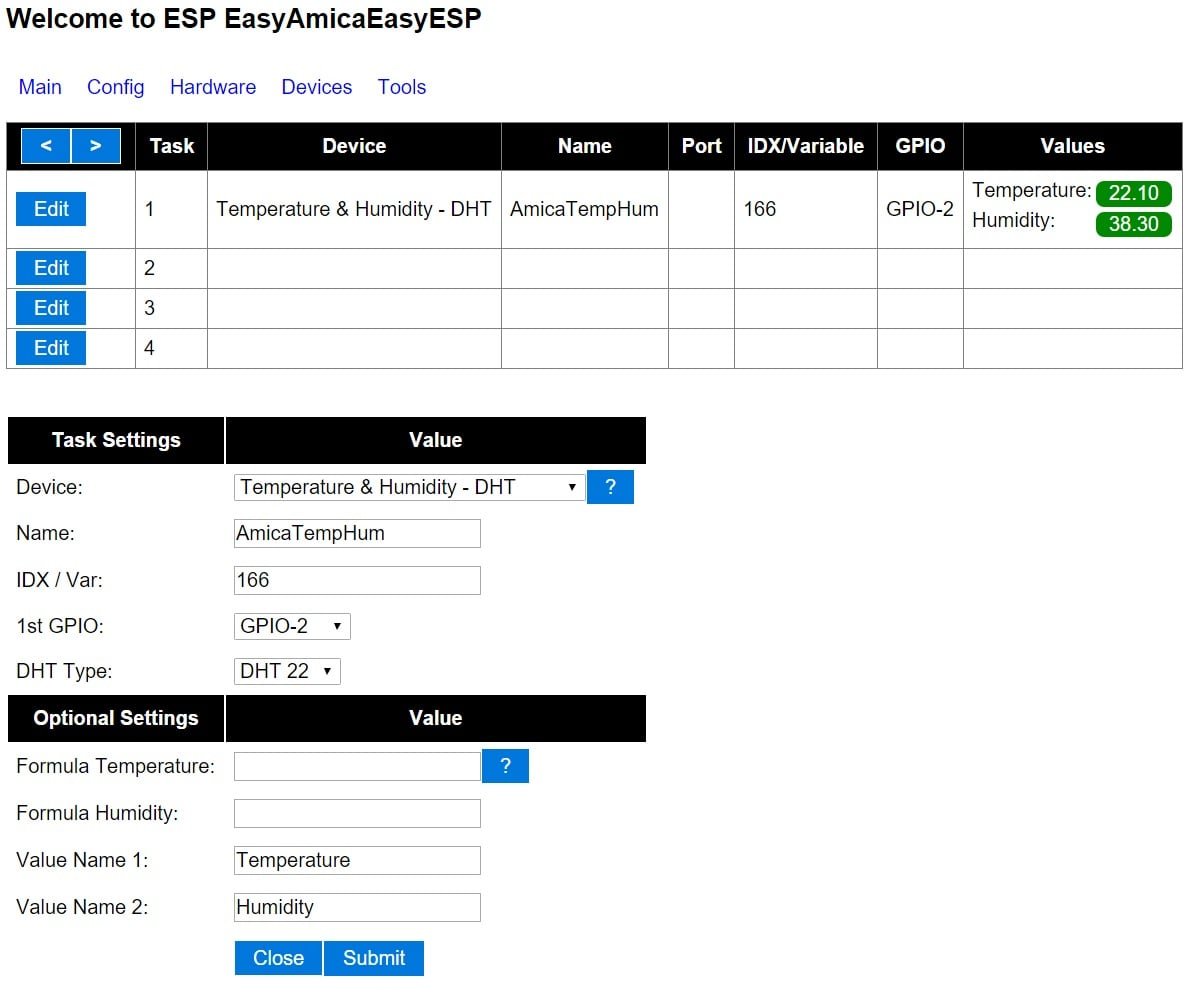
Pay attention – this is how the sensor was called and the values that we defined – we need to enter them again just the same for the display for ESPEasy to get data and to display them correctly:
The first value is the address on the I2C bus – to find out if we have correct one go to Tools->I2C Scan, which gives you the address – and notice that example shows another – connected to the I2C bus sensor – Lux – BH1750:
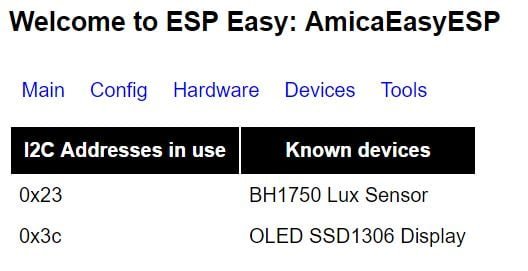
Out address is (hexadecimal): 0x3c!
If all is correct – we should see “ESPEasy” on the screen (upside down is still fine).
Next – we move to display configuration – direction, which line are used for displaying – but first let’s try to display some data from external source:
Remote and local display
ESPEasy allows you to display both local sensor dana or any other data via unprotected method – using just http URL.
What is possible – first we can turn on/off the display. In this example the IP address of ESP8266 running ESPEasy is 10.20.30.40. We can turn off the display (i.e. it’s too bright in the night)
http://10.20.30.40/control?cmd=oledcmd,offThen to turn in on:
http://10.20.30.40/control?cmd=oledcmd,onWe can clear the display:
http://10.20.30.40/control?cmd=oledcmd,clearNow, to us it in our project – we should use the curl to send data from Raspberry Pi:
curl http://10.20.30.40/control?cmd=oledcmd,wiersz,kolumna,nasz_tekstAn example of sending data:
curl http://10.20.30.40/control?cmd=oledcmd,1,1,Moj%20login:%20$LOGNAMEFinally, we will use this function to display data from other sensor that our Raspberry Pi has data of – the opposite of what we usually use the ESP for!
But first – we should get the data from our already connected DHT22 and lux sensor. Let’s type the name of our sensor in Line 1. The Line 2 could hold the info about uptime – and time – we know that device is working and has proper communications with NTP.
Where to set NTP ? Go to NTP in Tools and choose your favourite NTP server – i.e. pool.ntp.org.
We got time & uptime – that’s easy. Displaying variable takes more effort – we need to use the percentage as brackets (%). Take a peek at Wiki page for examples.
We’re ready to display the data from DHT22. It’s time to check what was it’s name in the configuration:
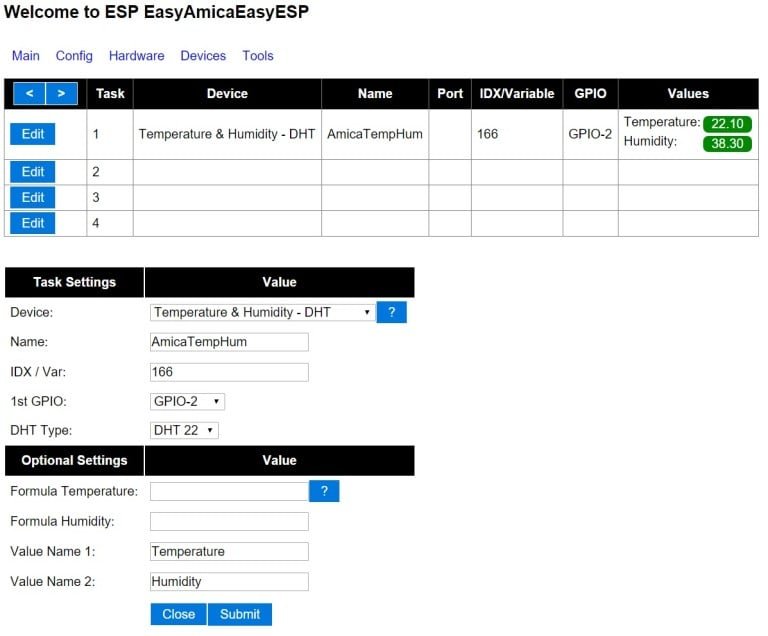
– and here it’s name is: AmicaTempHum. It’s a bit different we need “[ ]”, and the variables (we have two of them when talking to DHT 22) are separated by (#): [AmicaTempHum#Humidity]. This time the “%” is used to tell you that humidity is in % – so it’s supposed to be displayed.
We take the same approach for temperature. Since by default we set 300 seconds of update time – we should get on the screen, after a while:
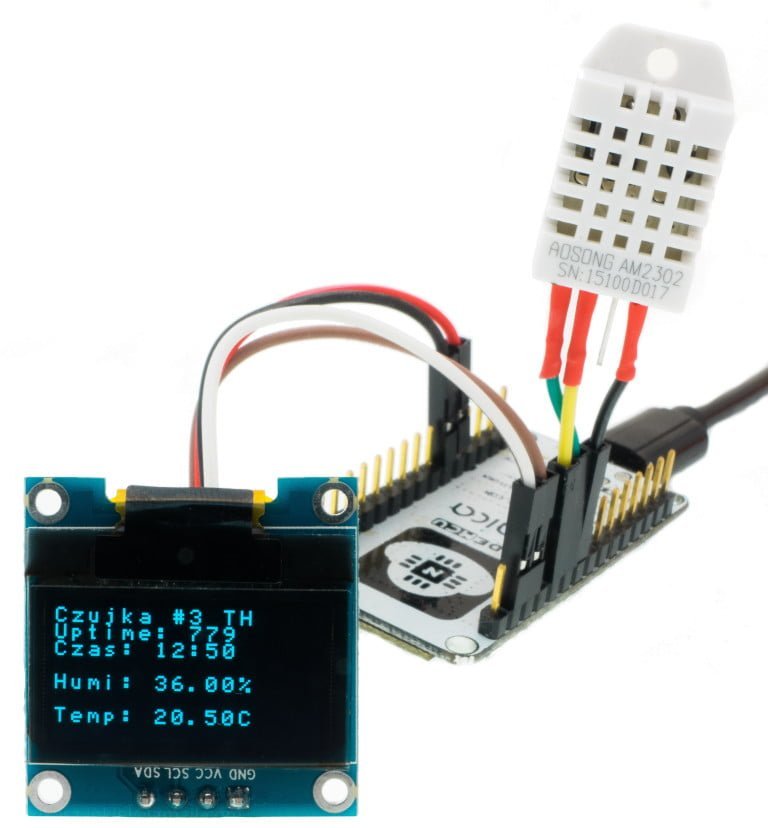
OPTIONAL: Since we can have quite a lot devices on I2C bus – let’s connect in paralel lux meter – BH1750. Meaning: VCC 3,3V to VCC, SDA & SCL to SDA & SCL finnaly GND to GND. Just like DHT22 it needs tiny amounts of power so the Amica NodeMCU can handle it safely. If we connected it properly we should get this info:
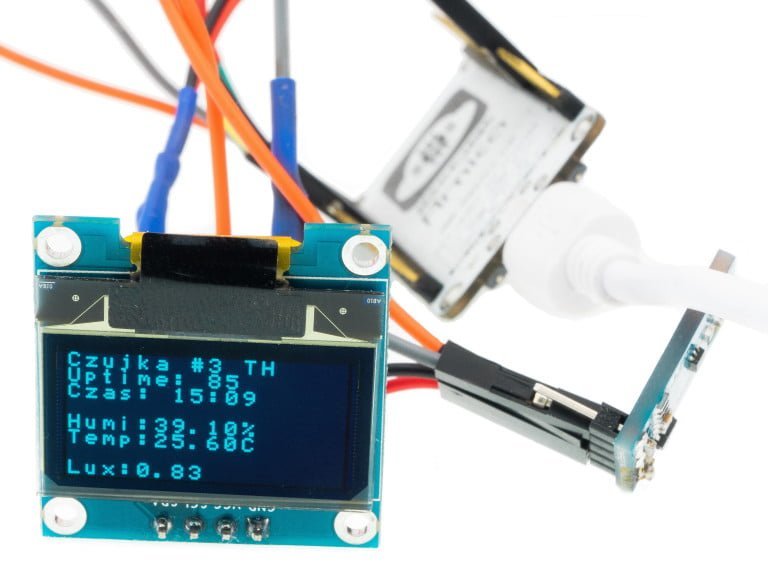
So, next photo show how much light I’m using here:
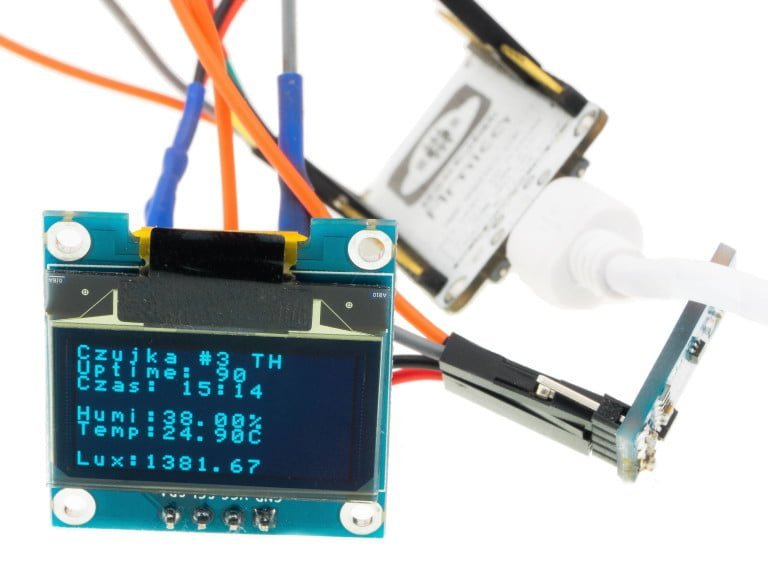
Beware – if you’re getting values like 54612 lux – the sensor is NOT working properly (check connections).
This is it – domoticz needs to be updated with new virtual Lux sensor (the virtuals for DHT22 have been added last time). So what to do with light intensity sensor ? Using the same approach as with the script for opening garage – we can turn on some LED lamps if it gets dark enough. Or use ‘Events’ in domoticzu if you like GUI approach.
But wait! People commenting this brought up interesting idea:
Displaying other values FROM domoticz on remote sensor
Looking at our example we see that Line 7 is empty. Originally I wanted to add the baraometer, but the shop canceled the order. I have other one on RPi – so why not use this data – atmospheric pressure cannot be that different, right? The BMP180 gives me temperature and pressure in hPa. I don’t care about the temperature, but the pressure is interesting. Since we already brought up the garage exampe you might remember that a LUA script w domoticz can give you data and allows you to use it:
we need to get the pressure data
cut it (remove extra info)
display it on SSD1306 attached to ESP8266
The LUA script will use the round function – single digit, and will be launched every minute (or smarter – at any change then if with devicechanged) – so let’s use the time option.
In my system this sensor is named ‘TemperaturaCisnienie’ so remember the name of the script has to match it:
script_time_TemperaturaCisnienie.luaIP address needs to match your network - and script goes to /home/pi/domoticz/scripts/lua:
function round(num, idp)
 local mult = 10^(idp or 0)
 return math.floor(num * mult + 0.5) / mult
end
hektopaskale=round(otherdevices_barometer['TemperaturaCisnienie'],1)
commandArray = {}
commandArray['OpenURL']='10.20.30.40/control?cmd=oledcmd,7,1,Baro:'..hektopaskale..'hPa '
return commandArray
NOTE: Newer version of ESP Easy (inscluding ESP Easy Mega), use “oled” instead of “oledcmd”, as it was noted by one of the commentators.
So after a while you will get pressure on the screen.
Another example from comments discussion:
I you have the termometer from previous example about attaching termometers to domoticz – corresponding script is here (remember about the name!)
local NazwaCzujnika="ZKominka"
commandArray = {}

if devicechanged[NazwaCzujnika] then
    commandArray['OpenURL']='10.20.30.40/control?cmd=oledcmd,7,1,Temp:'..otherdevices_svalues[NazwaCzujnika]..'*C'
   end
return commandArray
A NOTE: Newer versions of ESPEasy (i.e. ESPEasy Mega), instead of „oledcmd” use „oled”, as some commentators pointed out.
This time we only update on temperature CHANGE.

This work is licensed under a Creative Commons Attribution-NonCommercial-NoDerivatives 4.0 International License (c) 2014-2024 Łukasz C. Jokiel, [CC BY-NC-SA 4.0 DEED](https://creativecommons.org/licenses/by-nc-sa/4.0/)