Light effect for any device with video output based on Raspberry Pi with Raspbmc or Openelec
“Good news, everyone!”. If you succeeded in creating light effect using the previous entry: https://blog.jokielowie.com/en/2014/02/efekt-swietlny-dla-media-playera-operatego-o-raspberty-pi/ you must’ve noticed that it’s limited to the content being played by raspbmc or OpenELEC. Luckily thanks to constant development by hyperion’s creator (tvdzwan) we’ve just got ability to use the effect with other devices that have video output the http://pl.wikipedia.org/wiki/Composite_video. Usually modern STB, Blu-Ray player or amplituners sport a SCART output or the yellow colored ‘Video’ output. What is important – they allow both HDMI and Composite video outputs to be working simultaneously.
==
What is needed?
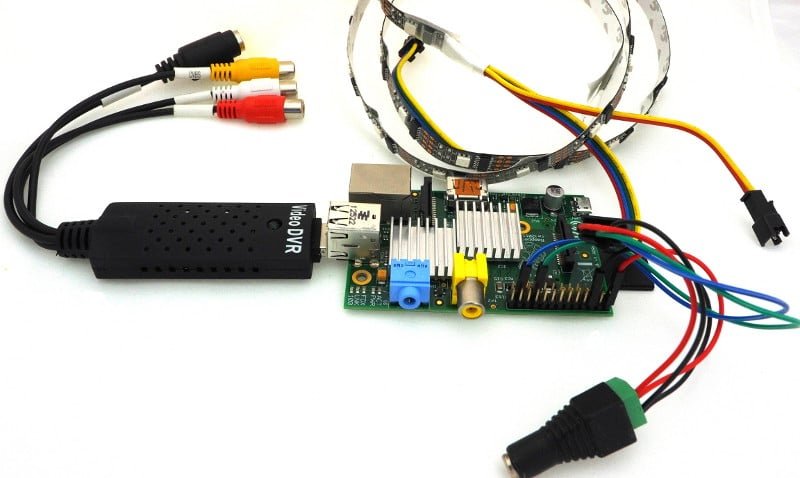
This time we need to get a cheap $10 ‘TV grabber ‘ or Video DVR’ USB dongle. It has Composite Video and Audio (L+P) inputs, and those sticks are used to transfer to new world movies from old VHS cassates:

Hardware and software configuration
So those $10 dongles with different names (i.e. EzCap) are equipped with two chipsets: STK1160 or Fushicai. To check which is in our dongle issue:
sudo lsusbOpenELEC
Both are supported by latest OpenELEC (Ghost 13), but make sure that lsmod contains (but not limited to) this modules when Fushicai chipet is present:
OpenELEC:~ # lsmod
videobuf2_core
videobuf2_vmalloc
usbtv
When STK1160 is present lsmod contains (but not limited to) this modules:
OpenELEC:~ # lsmod
spi-bcm2708
videobuf2_core
videobuf2_vmalloc
stk1160
The working grabber can be checked in many ways, for starters let’s issue:
OpenELEC:~ # ls -al /dev/video*
crw-rw----    1 root     video      81,   0 Jan  1  1970 /dev/video0
Plese do remeber if you’ve identfied video0 – or maybe video1 this is important for configuration.
So we’re ready to test – lets grab our first video frame:
OpenELEC:~ # LD_LIBRARY_PATH=$LD_LIBRARY_PATH:/storage/hyperion/bin /storage/hyperion/bin/hyperion-v4l2 --screenshot
V4L2 width=720 height=576
V4L2 pixel format=YUYV
V4L2 grabber signal threshold set to: {0,0,0}
V4L2 grabber started
V4L2 grabber stopped
The result should be the screenshoot.png file – you can use the Pictures menu in OpenELEC to view it or transfer via Filezilla to PC and view it there.
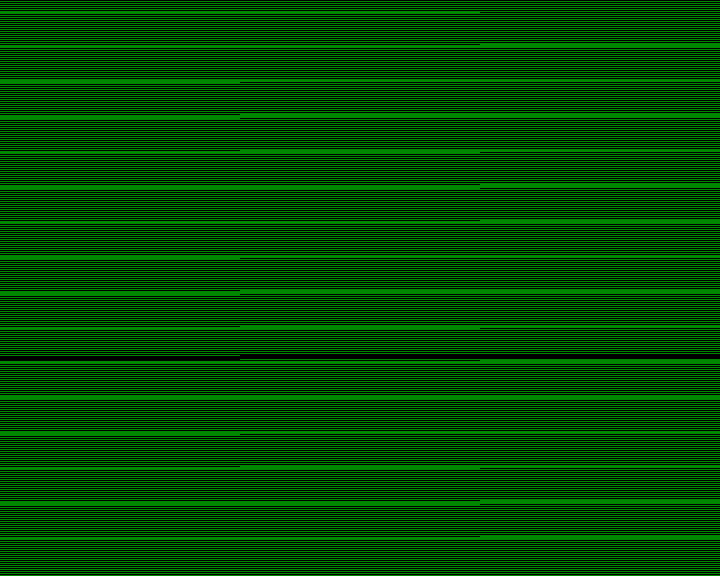
If you don’t have input video the picture is going to look like this:

If the composite input signal is present and OK you will get a greenish picture – just like form the first days of television:

So it works! Don’t worry about the greenish tint we will get rid of with by decimating the frame – we don’t need such precision. Now the part of the kernel that takes care of the grabbing is called Video 4 Linux 2 or simply V4L2. This is enough to make it running – please add the new section of the configuration to /storage/hyperion/config/hyperion.config.json but before last bracket:
/// Configuration for the embedded V4L2 grabber
    ///  * device          : Urządzenie V4L2, którego mamy zamiar użyć [default="/dev/video0"]
    ///  * input           : Wejście V4L2którego mamy zamiar użyć [default=0]
    ///  * standard        : Standard Video (no-change/PAL/NTSC) [default="no-change"]
    ///  * width                : Szerokość V4L2 obrazu [default=-1]
    ///  * height               : Wysokośćobrazu  [default=-1]
    ///  * frameDecimation      : Współczynnik cięcia klatki [default=2]
    ///  * sizeDecimation       : Wielkość współczynnika cięcia klatki [default=8]
    ///  * priority             : Hyperion priority channel [default=800]
    ///  * mode                 : 3D mode to use 2D/3DSBS/3DTAB (note: no autodetection) [default="2D"]
    ///  * cropLeft             : Cropping from the left [default=0]
    ///  * cropRight            : Cropping from the right [default=0]
    ///  * cropTop              : Cropping from the top [default=0]
    ///  * cropBottom           : Cropping from the bottom [default=0]
    ///  * redSignalThreshold   : Signal threshold for the red channel between 0.0 and 1.0 [default=0.0]
    ///  * greenSignalThreshold : Signal threshold for the green channel between 0.0 and 1.0 [default=0.0]
    ///  * blueSignalThreshold  : Signal threshold for the blue channel between 0.0 and 1.0 [default=0.0]
    "grabber-v4l2" :
    {
        "device" : "/dev/video0",
        "input" : 0,
        "standard" : "PAL",
        "width" : 360,
        "height" : 240,
        "frameDecimation" : 2,
        "sizeDecimation" : 8,
        "priority" : 1000,
        "mode" : "2D",
        "cropLeft" : 26,
        "cropRight" : 27,
        "cropTop" : 20,
        "cropBottom" : 20,
        "redSignalThreshold" : 0.1,
        "greenSignalThreshold" : 0.1,
        "blueSignalThreshold" : 0.1
    },
Now lets allow OpenELEC to use remote controll – menu Settings->Services->Remote Control->Allow other programs to control remotely. This is crucial to tell OpenELEC that we’re in menu or we’re palying a movie using OpenELEC – which will use the proper source for LED control.
Let’s test then! The effect should be visible while you’re in OpenELEC or raspbmc main menu (so right after start), but please check if Hyperion, is grabbing the frames while in menu. To turn of the grabbing – go to hyperion.config.json – and change – “grabMenu” : false,:
"xbmcVideoChecker" :
    {
        "xbmcAddress" : "127.0.0.1",
        "xbmcTcpPort" : 9090,
        "grabVideo" : true,
        "grabPictures" : true,
        "grabAudio" : true,
        "grabMenu" : false,
        "grabScreensaver" : false,
        "enable3DDetection" : true
    },
What’s the stress for Rpi 1 ? Using 96 LED, Raspberry PI B 256MB (the oldest model available) looks like this:
293     1 root     R     397m106.4   0 63.9 /usr/lib/xbmc/xbmc.bin --standalone -fs --lircdev /run/lirc/lircd
401   400 root     S    72328 18.9   0 17.1 /storage/hyperion/bin/hyperiond /storage/.config/hyperion.config.json
But what if you no longer have Composite/AV output from your other devices ? The answers is simple – use HDMI splitter and HDMI to AV converter.

This work is licensed under a Creative Commons Attribution-NonCommercial-NoDerivatives 4.0 International License (c) 2014-2024 Łukasz C. Jokiel, [CC BY-NC-SA 4.0 DEED](https://creativecommons.org/licenses/by-nc-sa/4.0/)