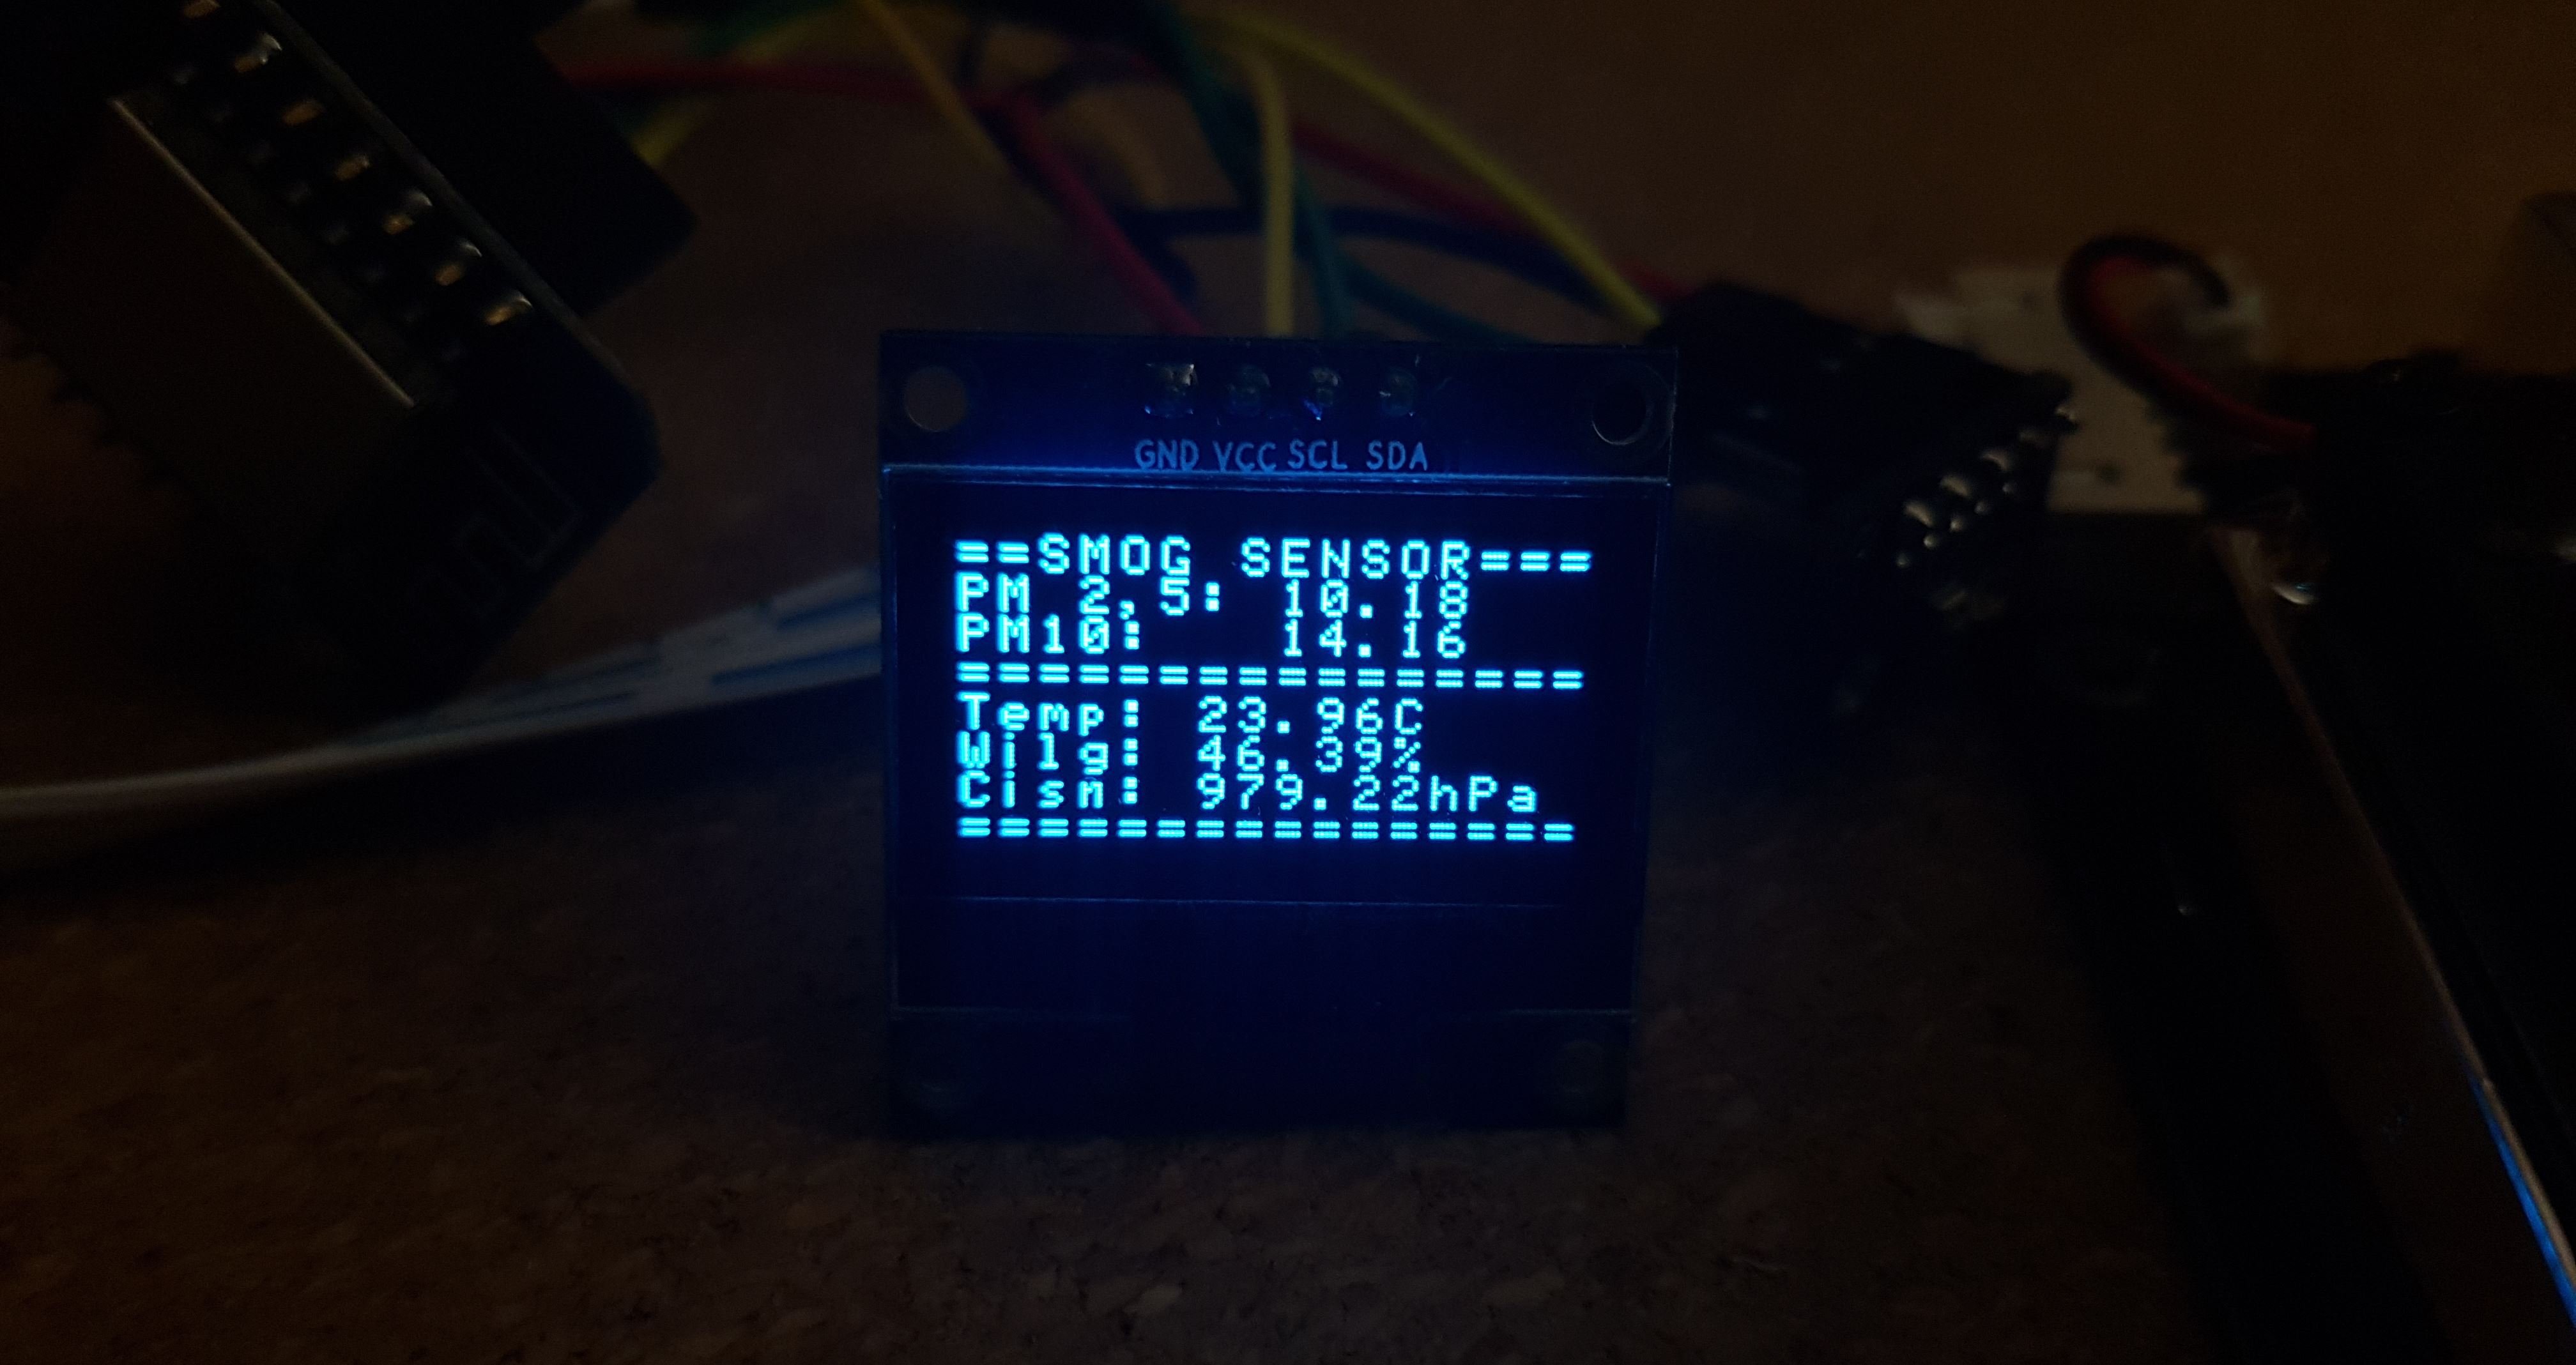
SMOG & ESP8266 Part 2: Wyświetlacz OLED, Pomiar warunków
SMOG & ESP8266 Part 2: Wyświetlacz OLED, Pomiar warunków
Last time we build a simple SMOG sensor, do it's high time to add display (OLED) and to verify the SMOG measurements – the environmental sensor – as we know that humidity over 70% can add up to the SMOG.
What will you need?
Hardware
- working SMOG sensor from previous entry, the Nettigo store has currently promotion – use the code: DIY_SMOG_15 to get 15% off the price
- BME280 board – temperature, humidity and pressure – the BME280 and please mind that the board supports VCC of 5V
- OLED screen – the SSD1306 that we have used before
- few jumper cables that need to be busted together
Software
- ESP Easy – already installed in previous step on the ESP8266 which is needed to control our SDS011 sensor
Let’s do it!
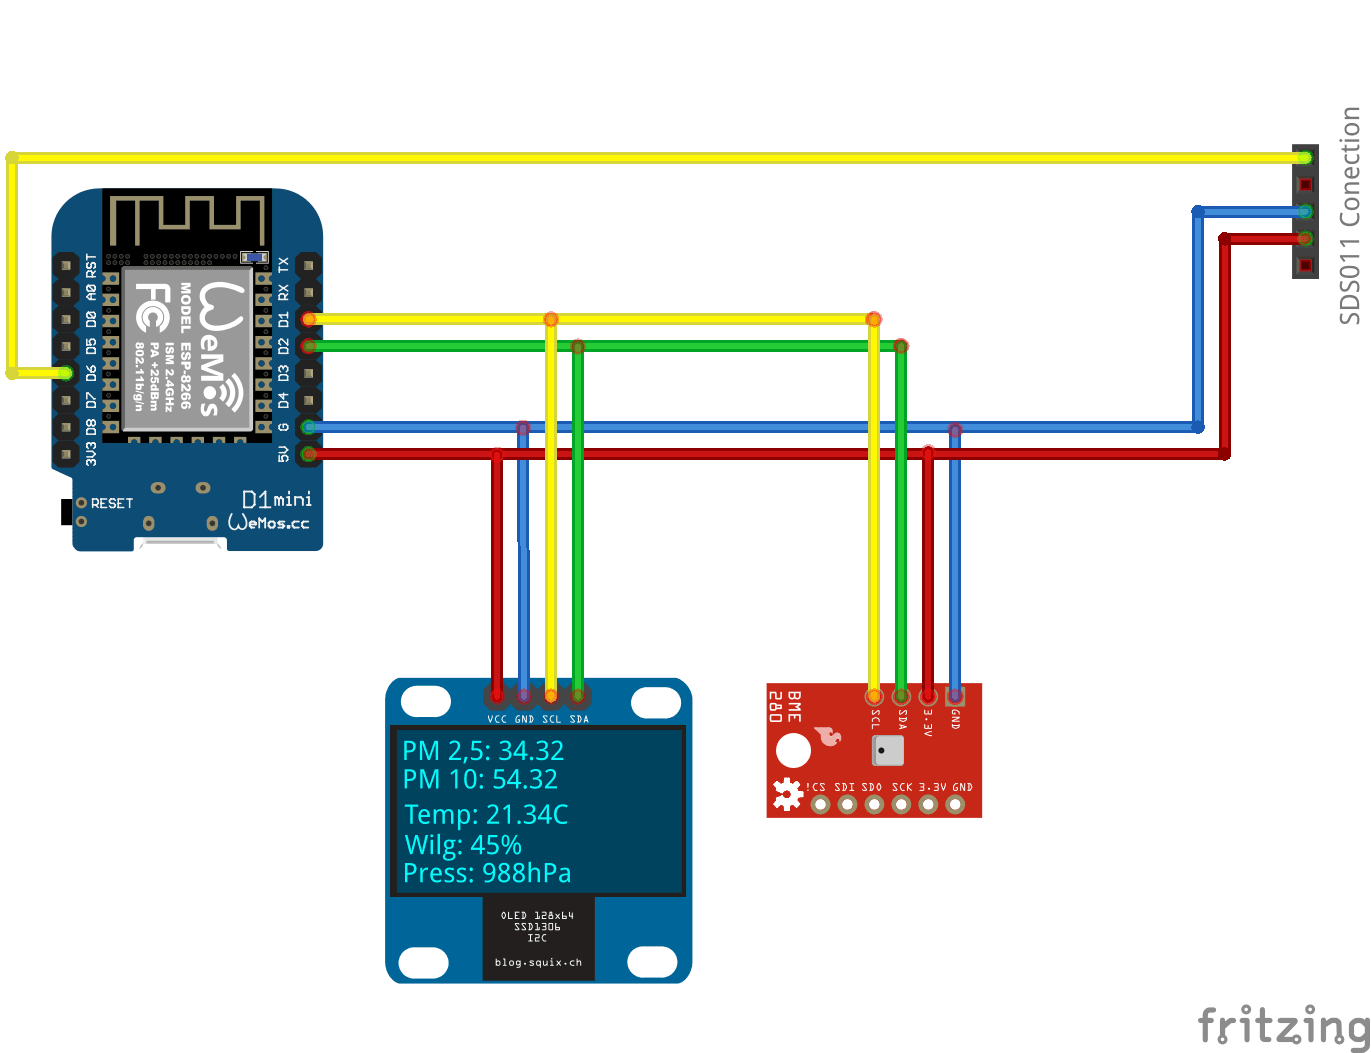
This is the hard part – we need to hook up all together, and there’re are several ways to do it , let’s try the KISS approach again: jumper cables:
- four connectors to VCC of 3,3V – red cable,
- four GND connectors – blue cable,
- three connectors for the I2C bus – SCL – yellow cable,
- three connectors for the I2C bus – SDA – green cable
Now pay close attention – connect according to this schema:

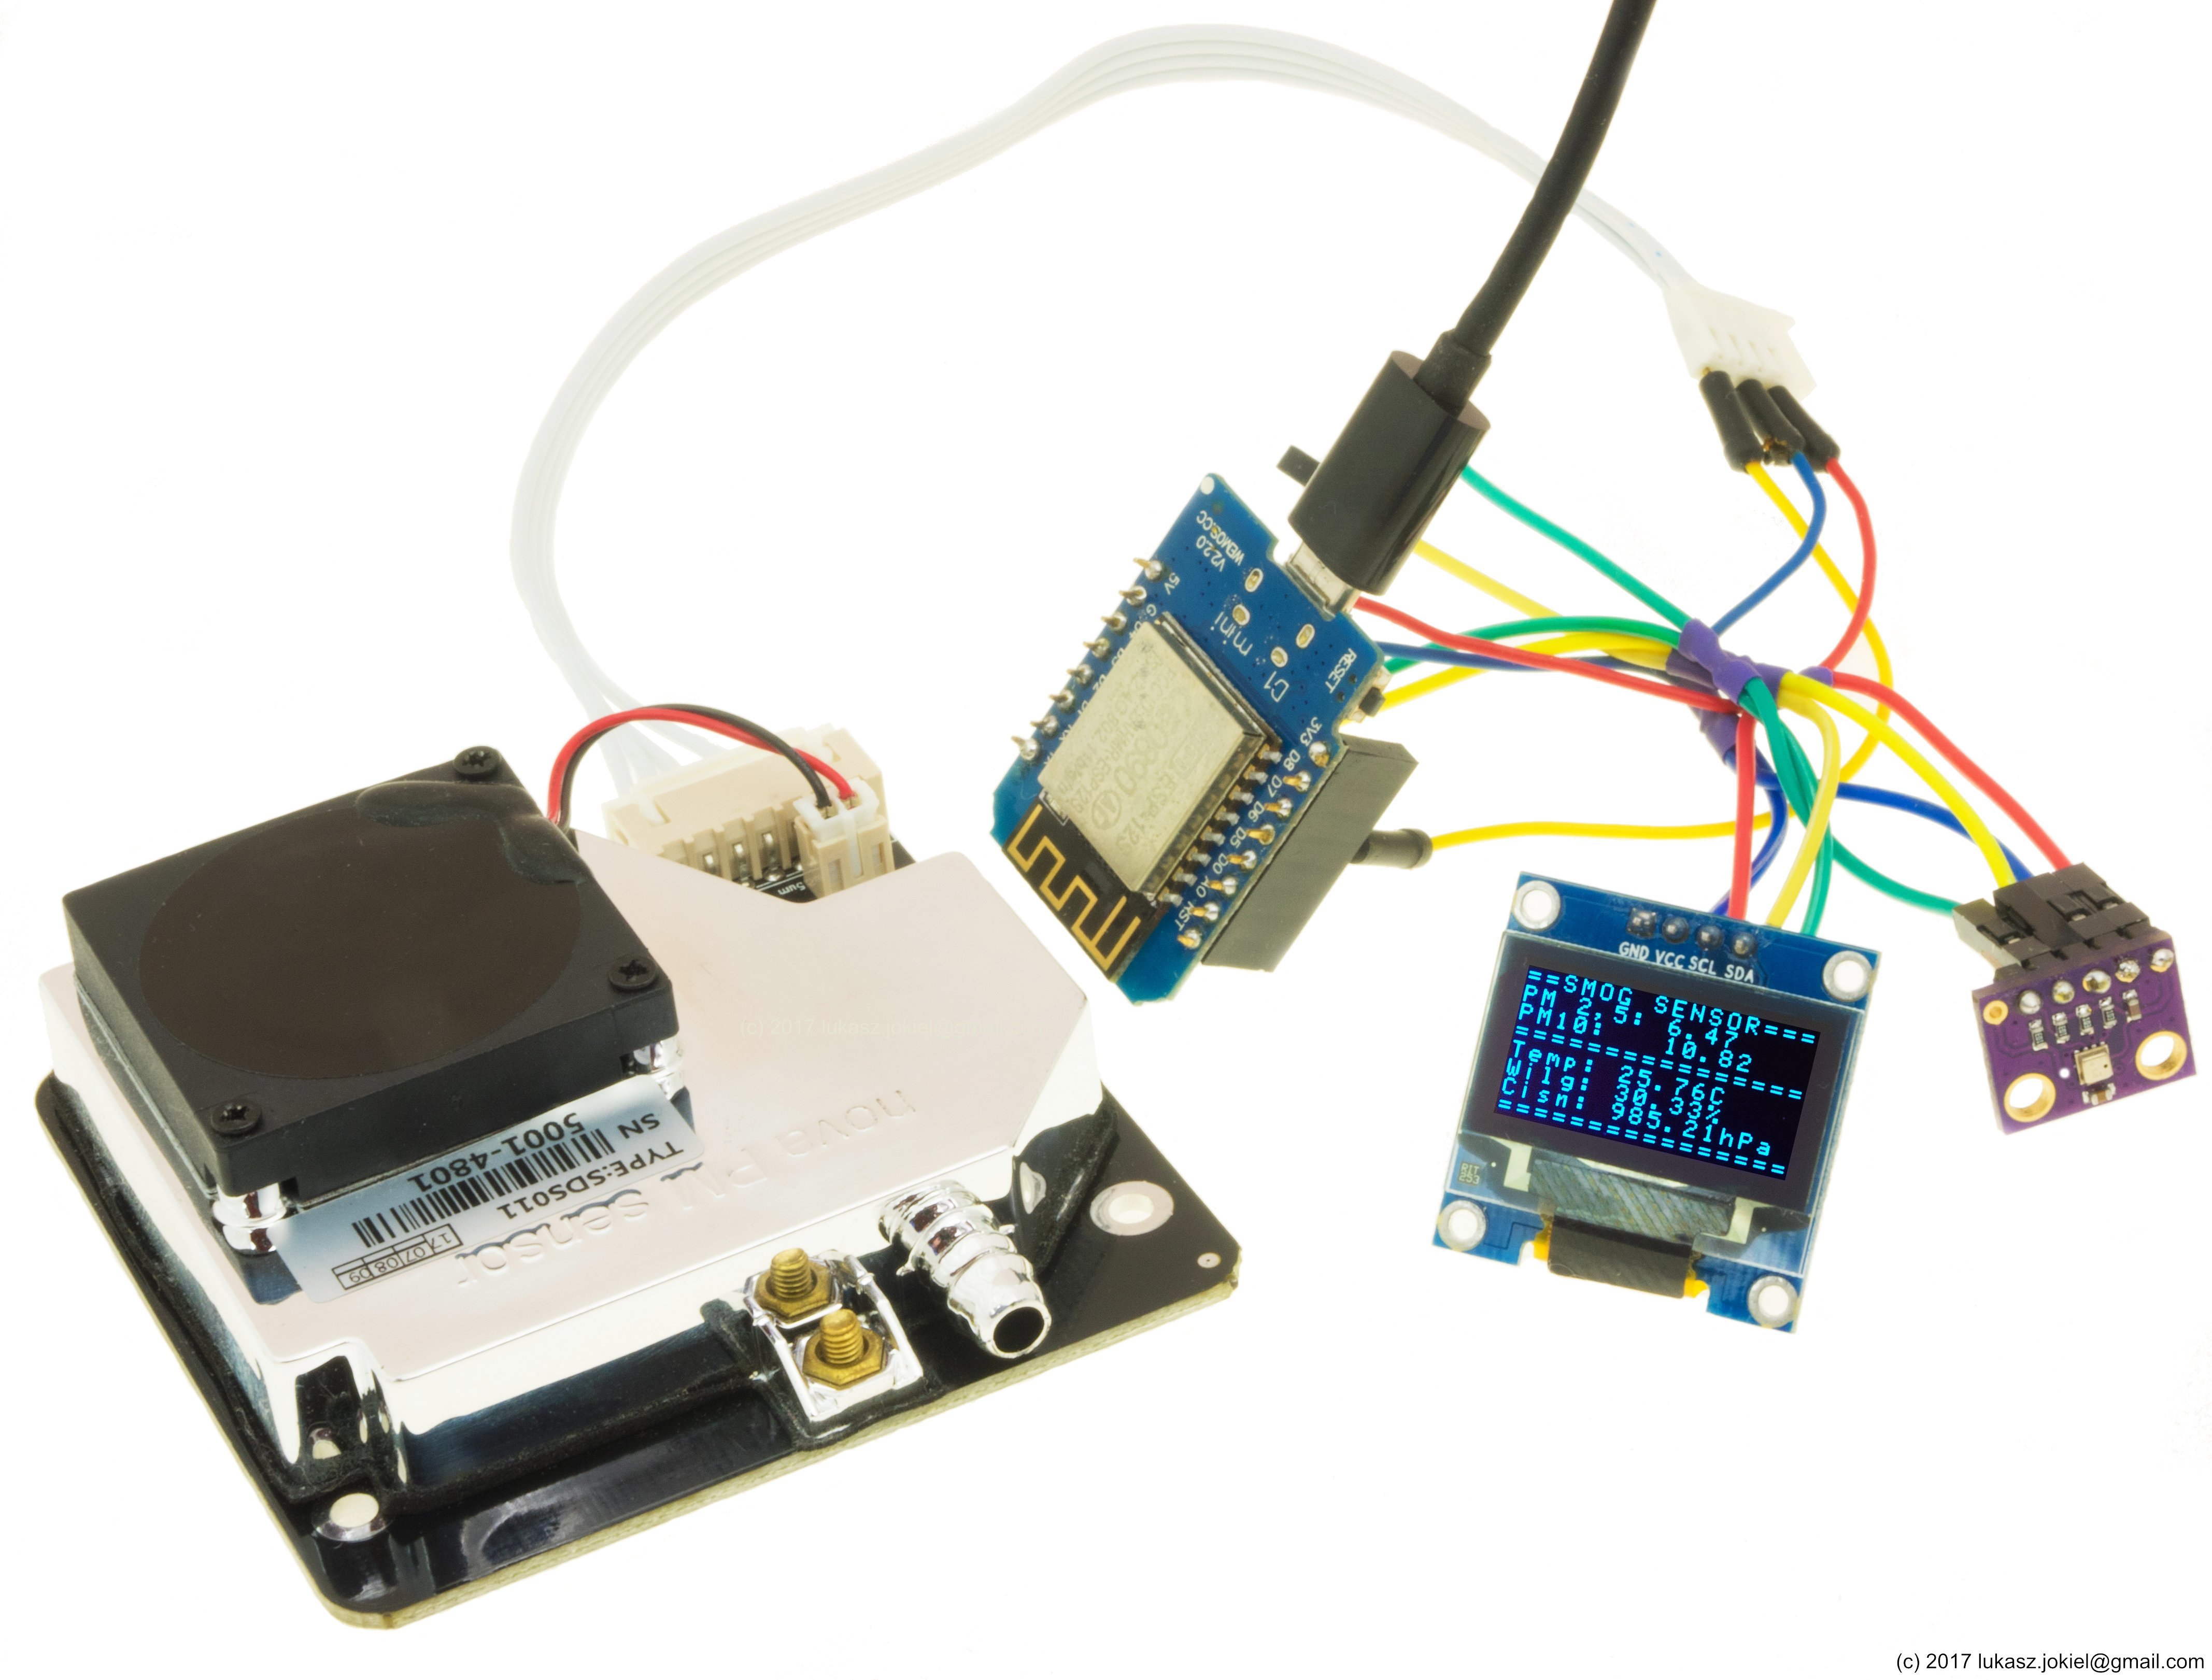
In the end you should get a similar “monster”:
Next-up in our programme – couple of ESPEasy reconfigurations:
- the names of the sensors and the values – need cleaning up
- let’s set quick refresh times
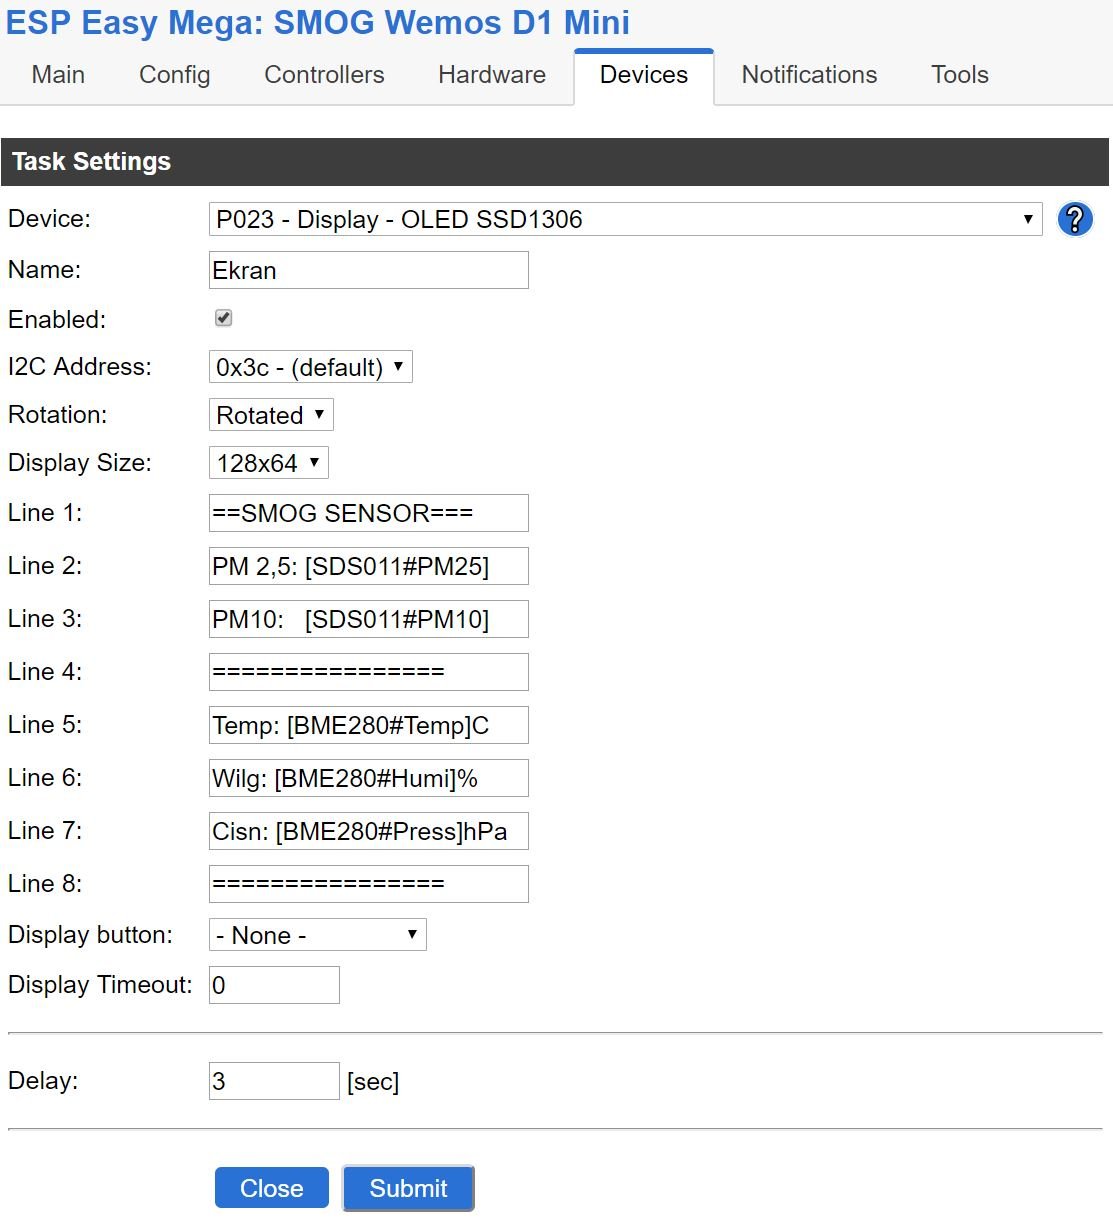
- finally – we need the OLED display to shine – with all the values
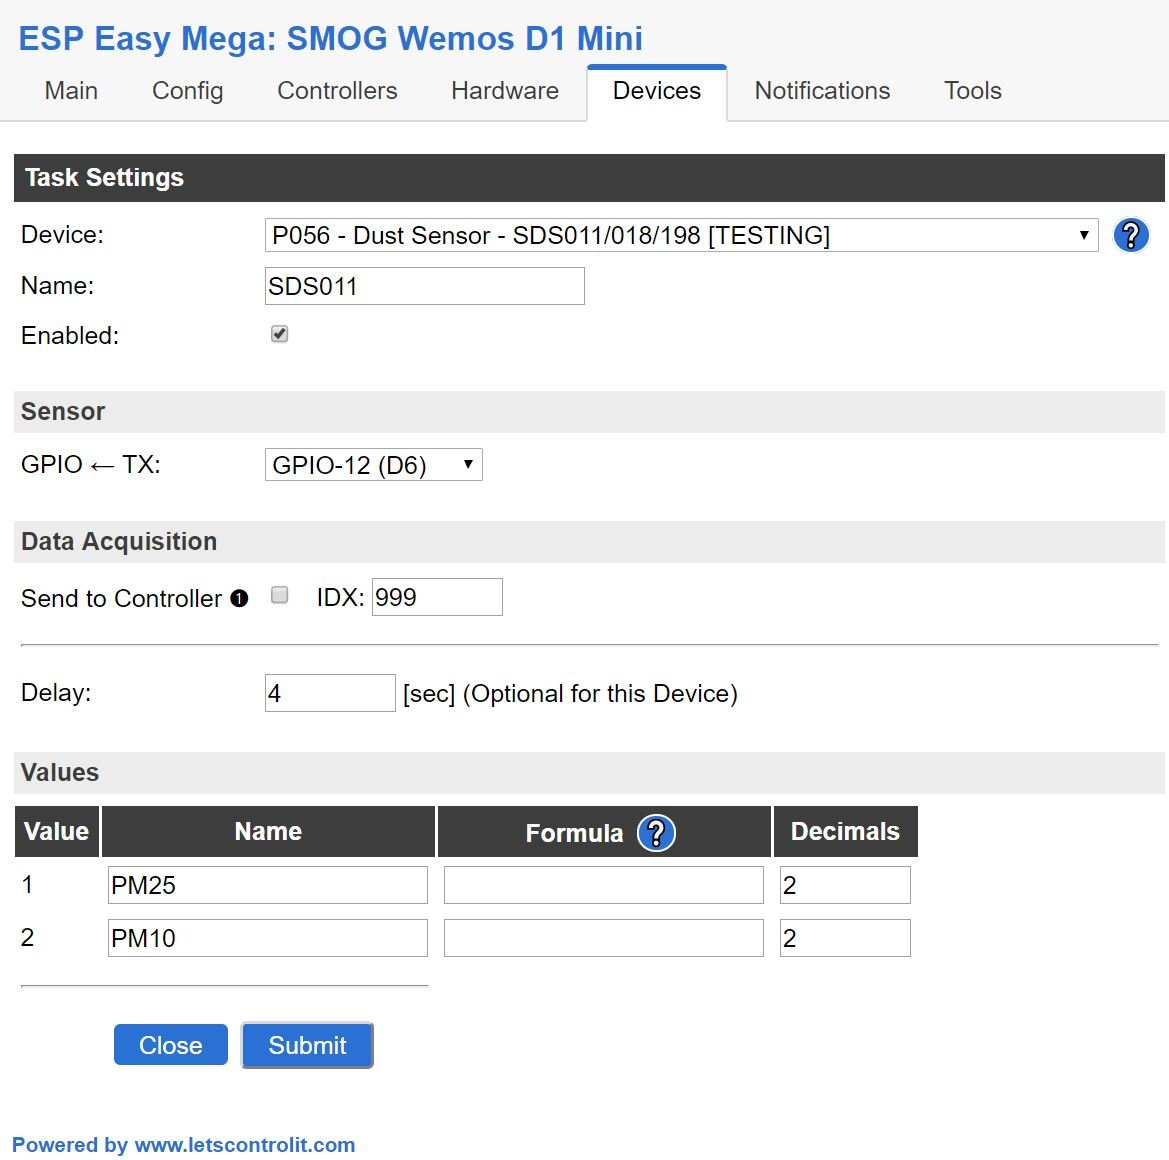
The Devices will look like this

First name the SDS Sensor (Name): surprise: SDS011, also the PM25 and PM10. Proper names are important for keeping it manageable:
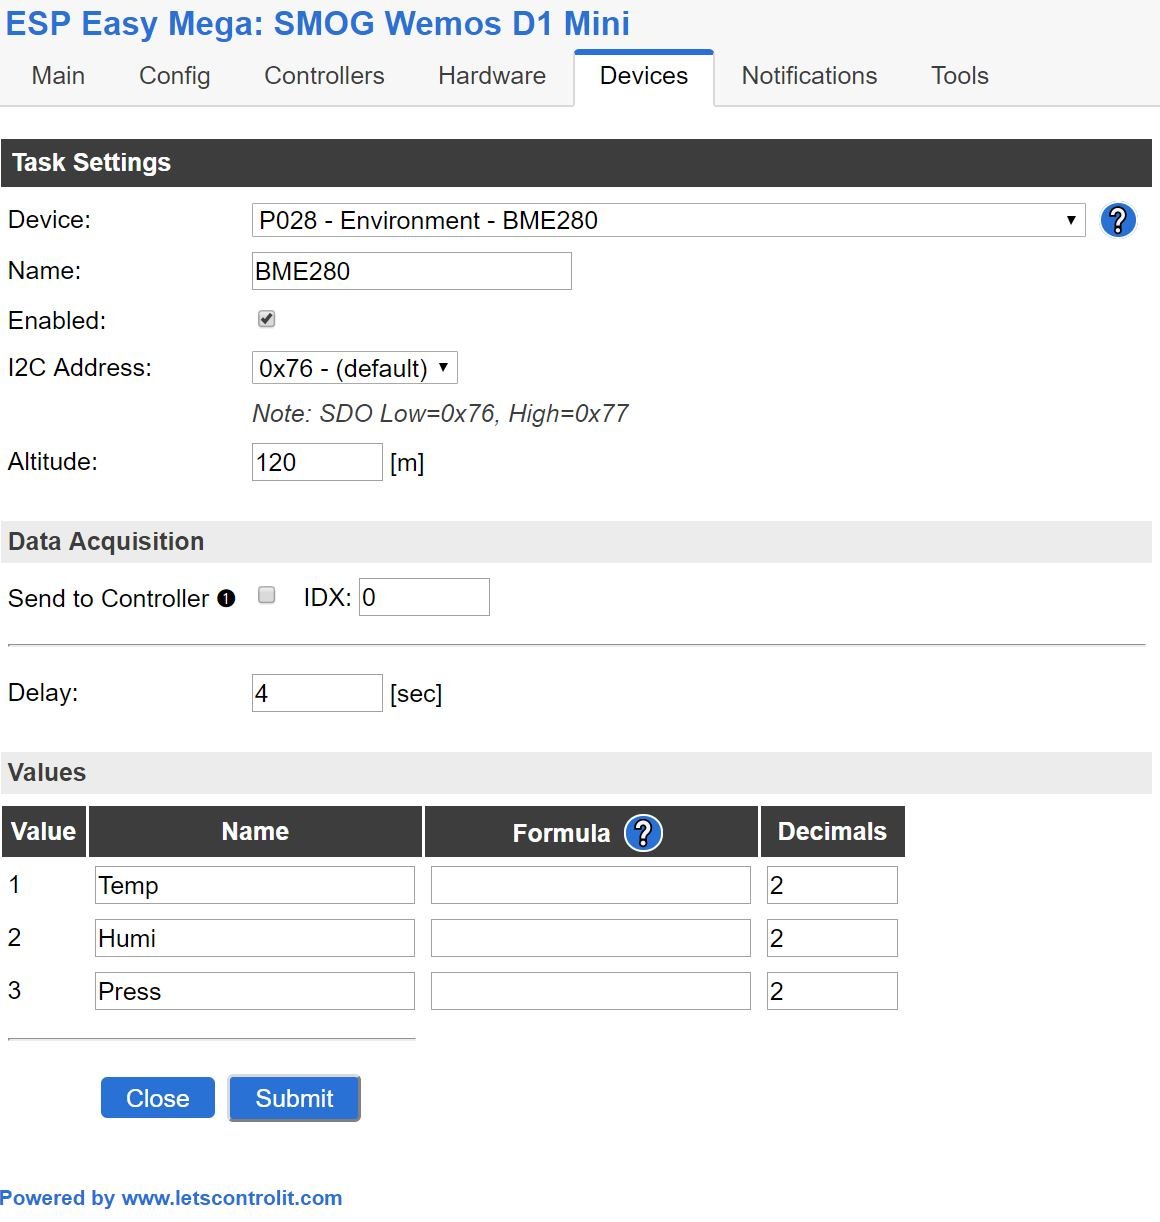
Turn to BME280 (coul be also BMP280, if you don’t need the pressure). The Altitude is to be set so we can get proper values of atmospheric pressure:
And the last step – OLED display configuration:
That’s it! Check out how fast the readings change. Go ahead show it in your school/work.
