Domoticz Part 3: ESPEasy – quick and easy sensor that we can use in a weather station with ESP8266
ESP8266 has become so popular that a beginner can choose from multitude of projects/firmwares and then – just start using them. Advanced IoT adopters will praise it’s quick implementation and stability. Today we will check out the Richard Ten Klooster’s project ESPEasy – https://github.com/ESP8266nu/ESPEasy. Basically ESPEasy is a firmware that can be flashed onto ESP8266 – preferably ESP-12E or ESP-12F and right after boot – we can join it’s WiFi access point (AP) to configure it via web interface. No console needed. Then, it is as easy as adding sensors (can be multiple) and ESPEasy starts to upload the data to Domoticz. The WiFi networks to connect to is named ESP_01XYZW, we should use “configesp” as WPA password and point our browser to 192.168.4.1
Take a look a the project webpage: https://espeasy.readthedocs.io/en/latest/
TL DR; If you ever wanted to use ESP8266 but it was too complicated – ESPEasy is the right tool for you and great remote sensor for weather station
What will you need?
ESPEasy requires at least ESP8266, best if it’s the ESP-12E or ESP-12F version. To make it even more easy – take a look at ready prototype boards with ESP8266, they have gold pins, own power supply that uses 5V/micro USB. This allows you to re-use old phone charger or powerbank with USB output. Let’s choose for this project a very nice and precise sensor – DHT22, that gives you temperature and humidity. Advanced users can simply get a ESP-12E, solder cables and use classic VCC of 3,3V.
Putting the software is also very easy – flash a */bin file, but I will get you through (optionally) full compilation & build phase. This might come in handy for testing newer version of EasyESP. YOu will need to download and install Arduino Studio, libraries and ESP Easy source, build it and flash it.
Hardware:
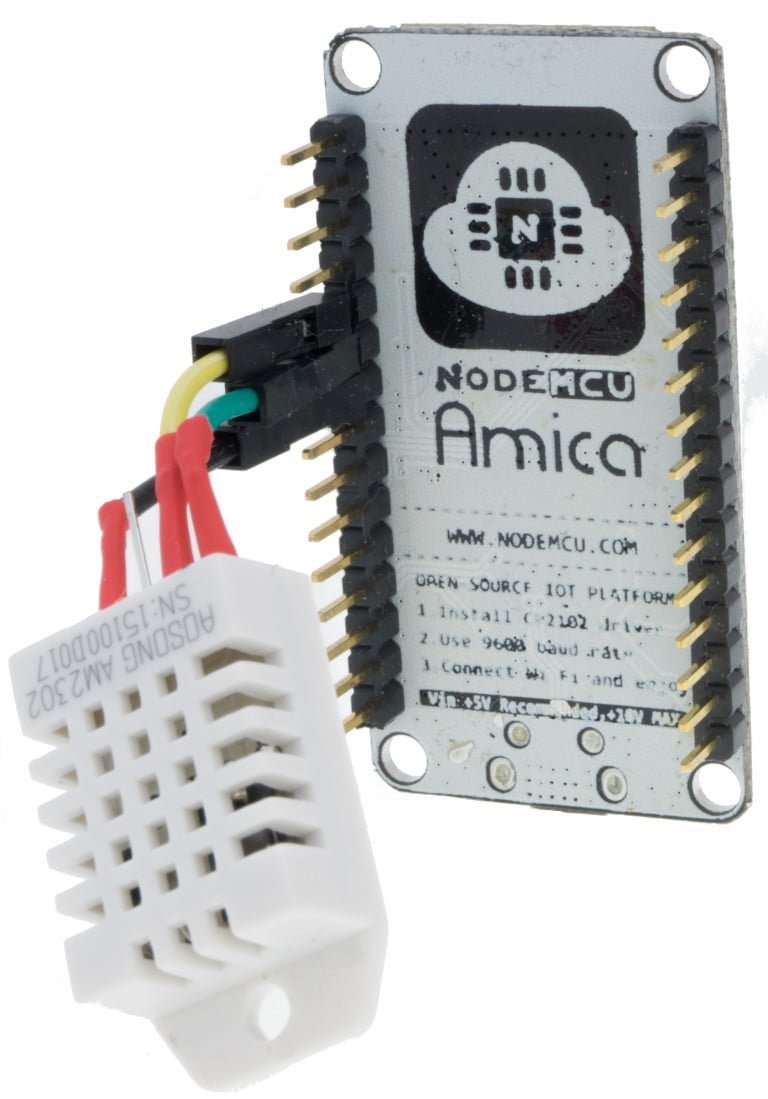
- I'm using here popular version of the ESP - the NodeMCU (2.0) with ESP-12E V2 (search for: Amica NodeMCU in your favorite online shop)
- DHT22 sensor
- jumper cables
- one 4,7k up 10k Ohm resistor
- OPTION: Raspberry Pi – used to flash, debug – also for console
Software:
- the easy path: ready ESPEasy firmware (*.bin file)
- the optional, interesting path: Arduino Studio – exactly 1.6.5 version
- sources from ESP Easy
OPTIONAL: Building the ESPEasy firmware
Let’s look at our ESP8266 board – we can now flash it with firmware that we can build from sources or flash the bin. As our polish commenter noticed (huczas) – we can use the 078 (or 120) version, that has three distinct versions for different size of the flash in tour ESP8266. Since we have NodeMCU – we use the “biggest” file. In case this doesn’t work for you – use the installed Arduino IDE in specific version – 1.6.5. This is a IDE software that is capable (but of course not limited to) of compiling – building firmware for ESP ESP8266. Let’s install (MS Windows, Linux) exactly this version 1.6.5: https://www.arduino.cc/en/Main/OldSoftwareReleases#previous.
But why 1.6.5 ? It supports our board and will work with this tutorial:
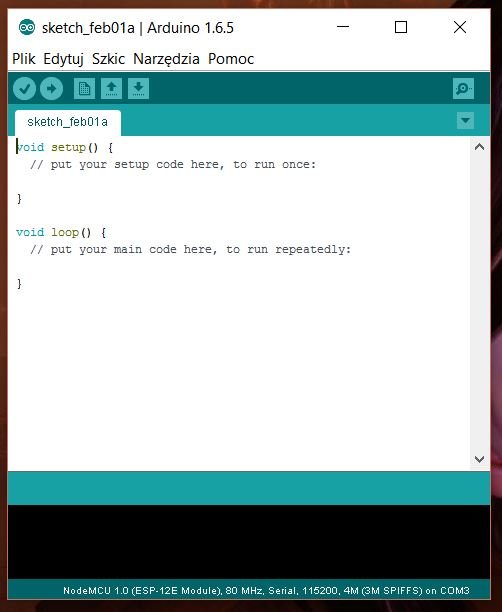
So let’s download now the board description for the IDE to understand what we will be building for: enter in preferences the Additional Boards Manager URLs:
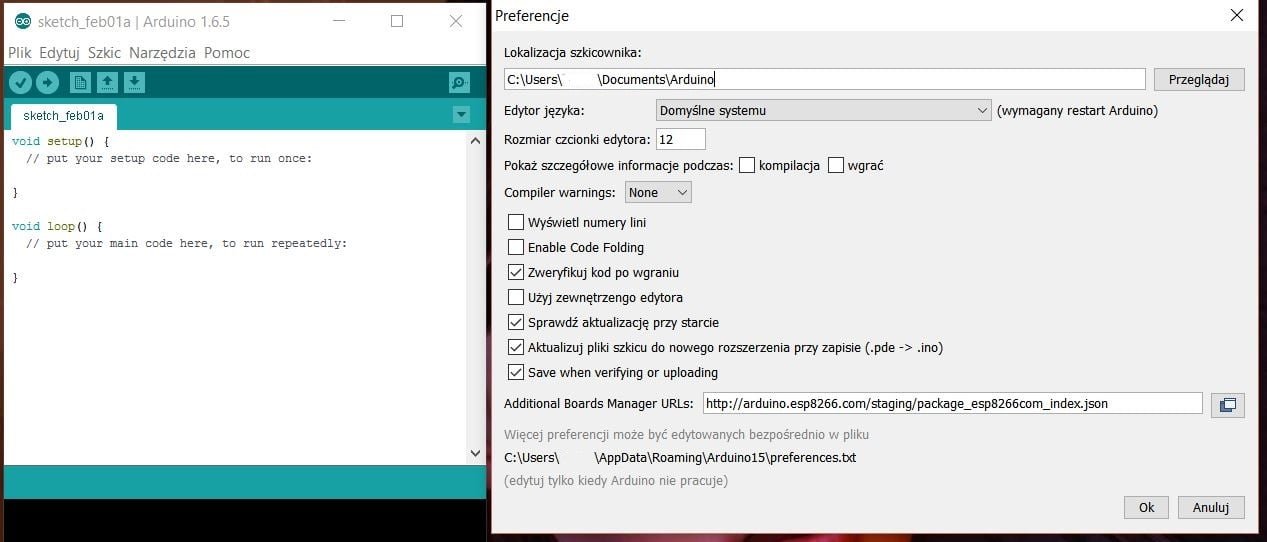
Type into “Additional Boards Manager URLs:” address: http://arduino.esp8266.com/stable/package_esp8266com_index.json that holds the ESPEasy 2.0.0 definition – Then go to Tools -> Boards Manager:
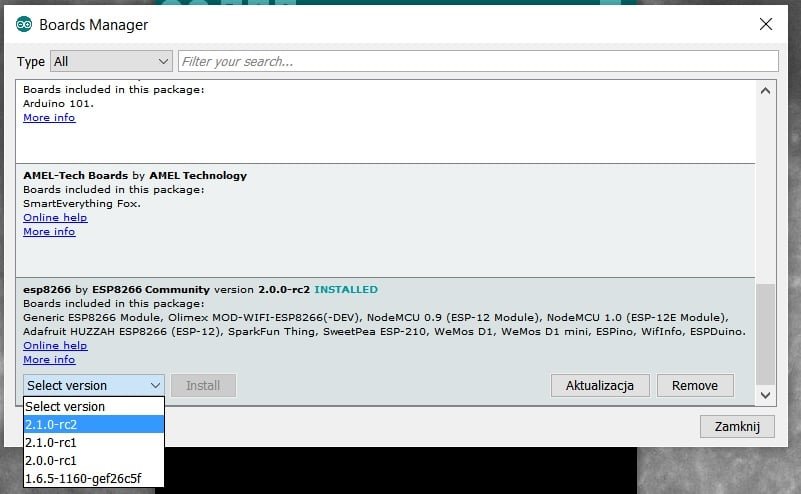
Install the esp8266 2.1.0-rc2 (or newer). Again go to Tools – and choose the right board:
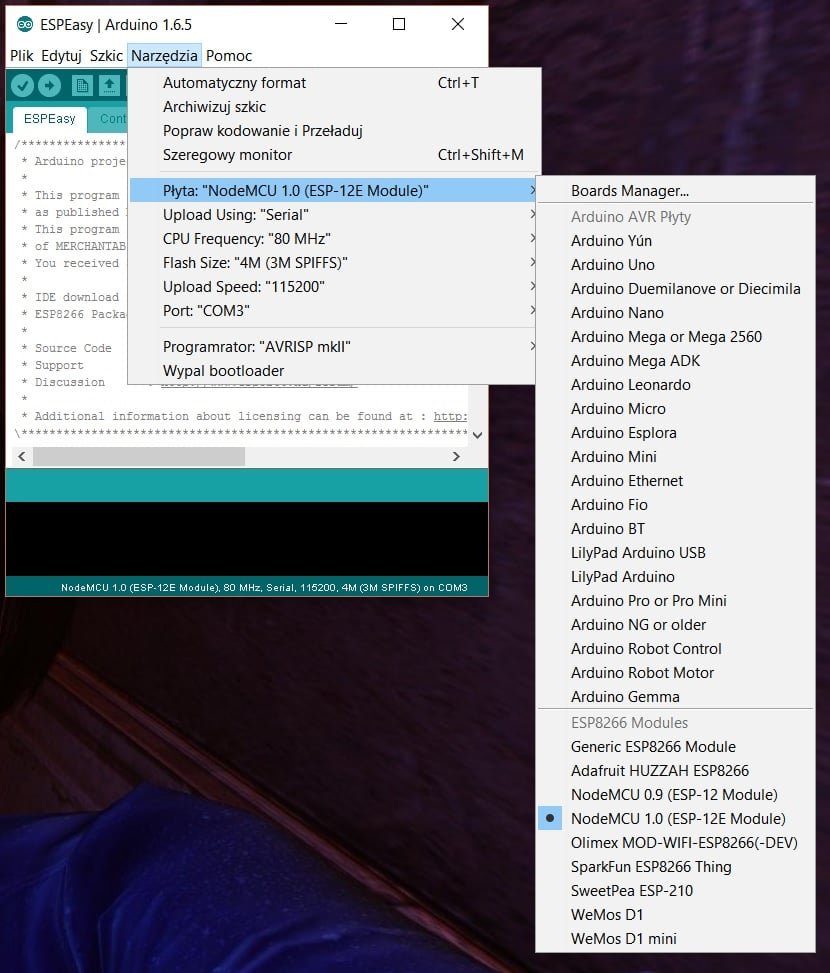
Now to get the sources (I was using here version 048), today (January 2017) we have stable version 120: http://www.letscontrolit.com/
After downloading – unpack the file into ESPEasy folder in Arduino IDE, copy the libraries – from folder Libraries to folder in Arduino IDE – libraries.
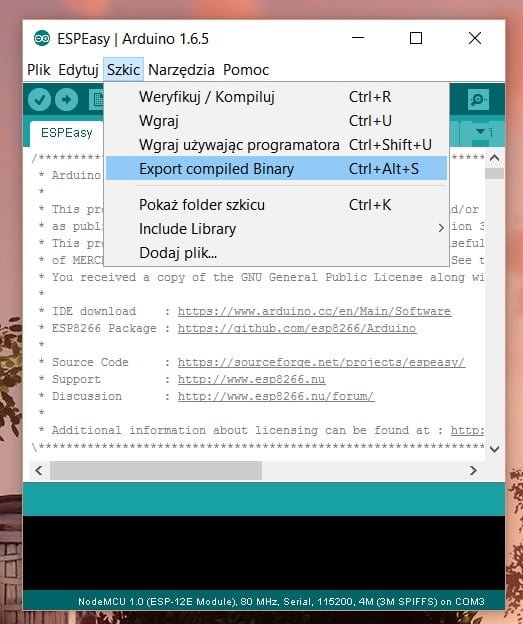
Open the ESPEasy.ino file via Arduino IDE and choose Export compiled binary. You should see the progress bar:
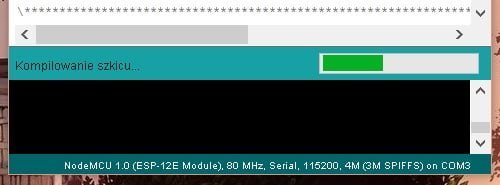
and then it should finish like this:

Look into the ESPEasy folder for file: ESPEasy.cpp.thing.bin
Flashing ESPEasy firmware
Connect your NodeMCU board to RPi, just like last time and choose either current version downloaded (078 4M) or the above 4M file: ESPEasy.cpp.thing.bin. Check the current firmware on the unit either:
=node.info()or this command will work:
AT+RSTSince a lot of cheap UART converters on MS Windows has issues with the chip and drivers (IP problem) – we are using here RaspberryPi. Put the file to the folder with already used esptool.py and let’s flash as before with some extra commands (SPI flash 4M): https://blog.jokielowie.com/2015/10/domoticz-cz-2-termometr-wifi-z-precyzja-do-dwoch-miejsc-po-przecinku-czyli-esp8266-dla-poczatkujach-w-praktyce/:
python esptool.py -p /dev/ttyAMA0 write_flash 0x0 ESPEasy.cpp.thing.bin -fs 32m -fm dio -ff 40mFlashing finished ? Now you got the ESPEasy installed! Reboot to run it, but first:
Connecting the DHT22 and Domoticz integration
As you probably noticed on the first photo – I did not connect the DHT22 using a pull-up resistor. You should – connect the middle DATA pin to VCC pin via ~10k resistor. It’s only my good luck that it works stable.
Connection
The NodeMCU has the interesting pins right above the WiFi logo:
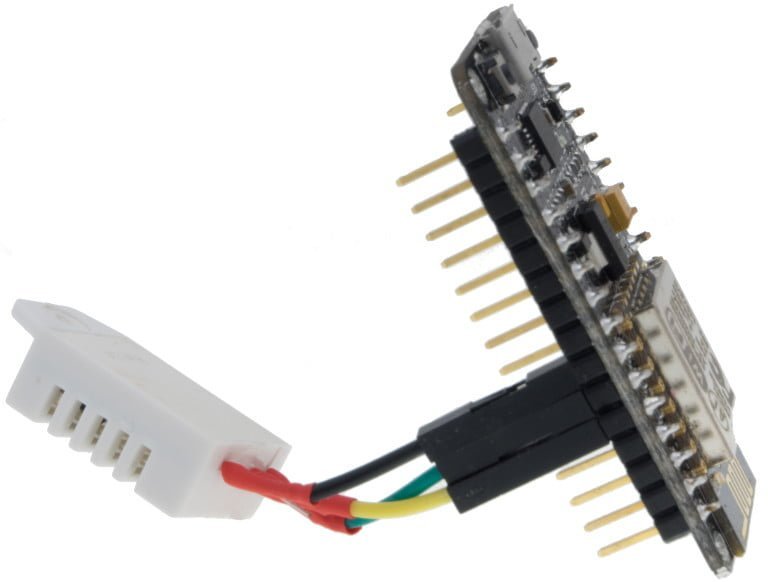
- +3,3V -> first pin on the left on DHT22 (looking en-face at DHT22, where you see the markings, serial number etc.)
- GND pin -> last, fourth pin from left DHT22
- D4 -> second pin from left DHT22, donlt forget to put also 10k resistor from D4 to +3,3V
Configuration
The NodeMCU v 1.0/2.0 requires +5V with microUSB cable – the same as RaspberryPi, and it could be an old 300-500mA phone charger (it could be also even 2A). After turing on the board – look on your PC/Tablet for new WiFi network (password “configesp”) in format of ESP_01WXYZ (last six characters are from the MAC address of the WiFi interface on ESP8266). Connect to this WIFi via browser: http://192.168.4.1/ and you will get this nice looking configuration menu:
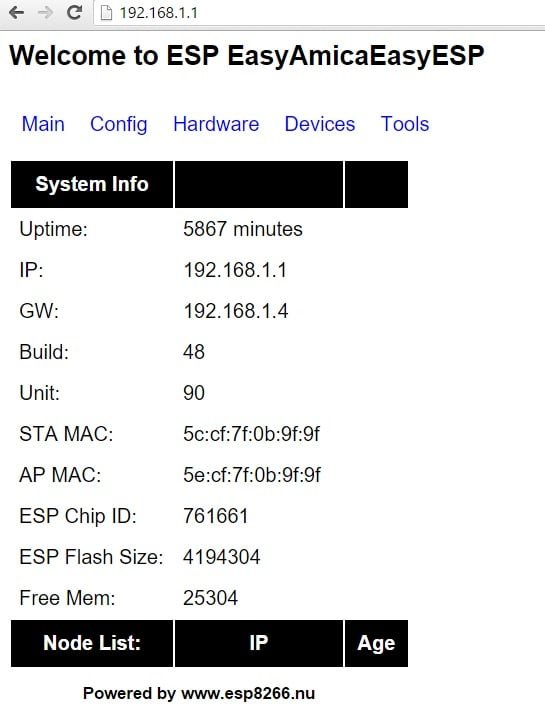
In this example we have already preconfigured the device so lets move to the Config tab, and enter our normal home netwokr WiFi details:
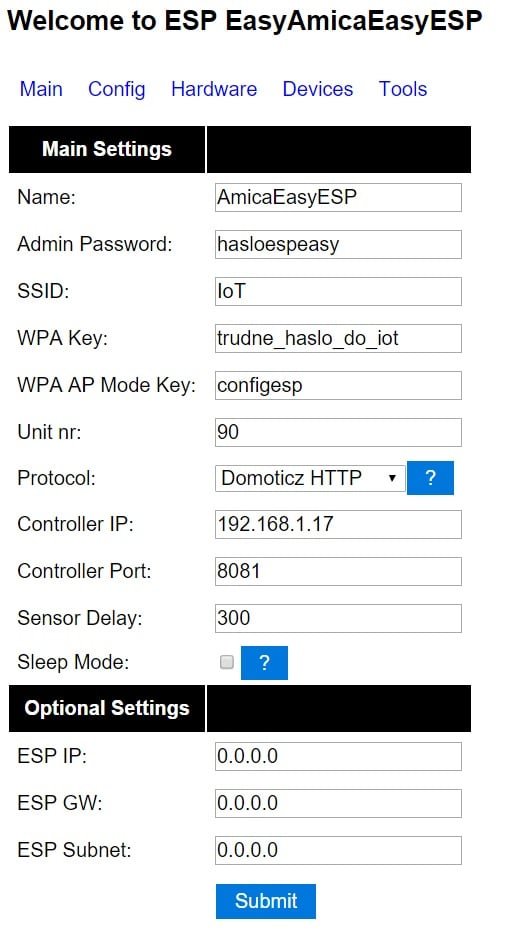
OK, so let’s give our device a friendly name, and access password to protect the Web interface (you can reset it via console – reset.). Next – the WiFi details – we expect that device can reach Domoticz via this network. Use if you can DHCP. The WP Ap Mode Key should be left with default value, but change the protocol to Domoticz HTTP, enter IP address of Domoticz and port. The important Sensor Delay parameter will determine the interval of the reporting the values – 300 seconds – we will update the data from DHT22 every 5 minutes!
Next – let’s tell ESPEasy that we have DHT22 connected – via the Hardware tab:
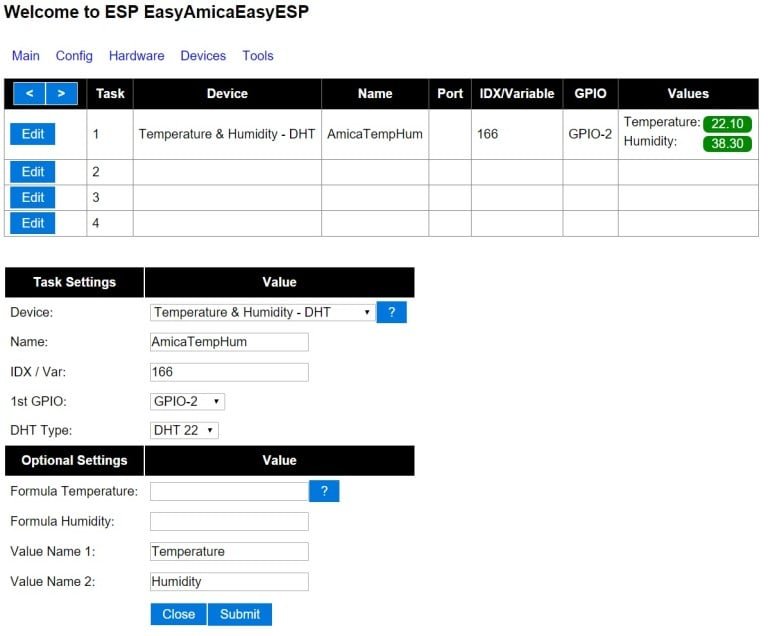
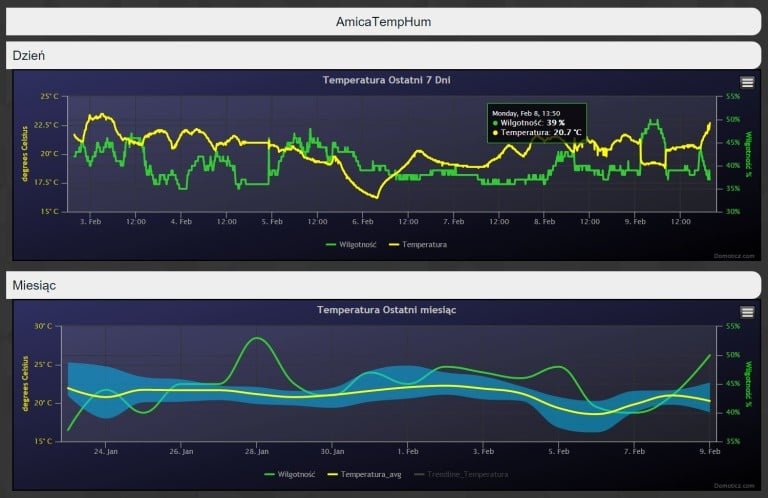
The key here is to use the pin on the NodeMCU – D4 is GPIO2 which is not THE BEST solution, and IDX – the virtual sensor index that we create in Domoticz. What’s that ? Just like here: https://blog.jokielowie.com/2015/07/przekazniki-kontaktrony-wake-on-lan-oraz-z-wave-czyli-domoticz-w-sluzbie-domu/ we need to create a “virtual’ sensor – which tells Domoticz that it’s not going to be linked to it’s hardware but rather it’s going to be updated via network, using for example JSON. So this time let’s create “Temp+Humidity” sensor!

This work is licensed under a Creative Commons Attribution-NonCommercial-NoDerivatives 4.0 International License (c) 2014-2024 Łukasz C. Jokiel, [CC BY-NC-SA 4.0 DEED](https://creativecommons.org/licenses/by-nc-sa/4.0/)