SMOG i ESP8266 cz. 4: Czujnik, który będzie działał latami dzięki ESPEasy 2.0 MEGA (SDS011 sleep-mode)
The SMOG sensor project became a bit complex – along with the addition of relay. In the mean time thanks to Gijs Noorlander and yours- since you build, ask and use the sensor – we got updated version of ESPEasy MEGA 2.0 for ESP8266.
Why the new blog entry? That’s because Gijs Noorlander’a added the included in SDS011 function that when sent over serial connections allows to put SDS011 to sleep. Simple, elegant solution to extend the life and quality of the measurements of the SDS011 – better than relay approach.
Now, just by means of connecting extra jumper cable we can go back to a simpler version of the sensor – a union of first version with addition of the temperature and humidity sensor form second project.
Pros and cons of the new design:
Pros:
- simplification of the project, same software
- using the included solution for sensor protection form SDS011 – to turn off fan and laser
- less power drawn (always good for battery powered projects)
- less CPU power consumed on ESP8266
- the same longevity as the relay version
Cons:
- if you would like to move to the next project in future – the relay will still be needed to power the heater
What’s changed then? In previous project the communication was just one-way the SDS011 will now be instructed to go to sleep, turn off fan and laser and wake in intervals (30 minutes + 30 seconds) to make correct measurement..
What will you need?
Hardware:
- ready project either first, second version
- jumper cable 1 (yes, just one)
Software:
- update of the ESPEasy softwar to the MEGA-dev 2.0 (we’re using today version from 26 January 2018: https://github.com/letscontrolit/ESPEasy/releases/). Your configuration of the ESP will be kept, but it’s always good to perform a backup along with “Rules” contents copy to separate file.
Let's do it!
If you haven’t yet switched to ESPEasy on ESP8266 on Wemos D1 mini please check out the instructions form first SMOG and ESP project.
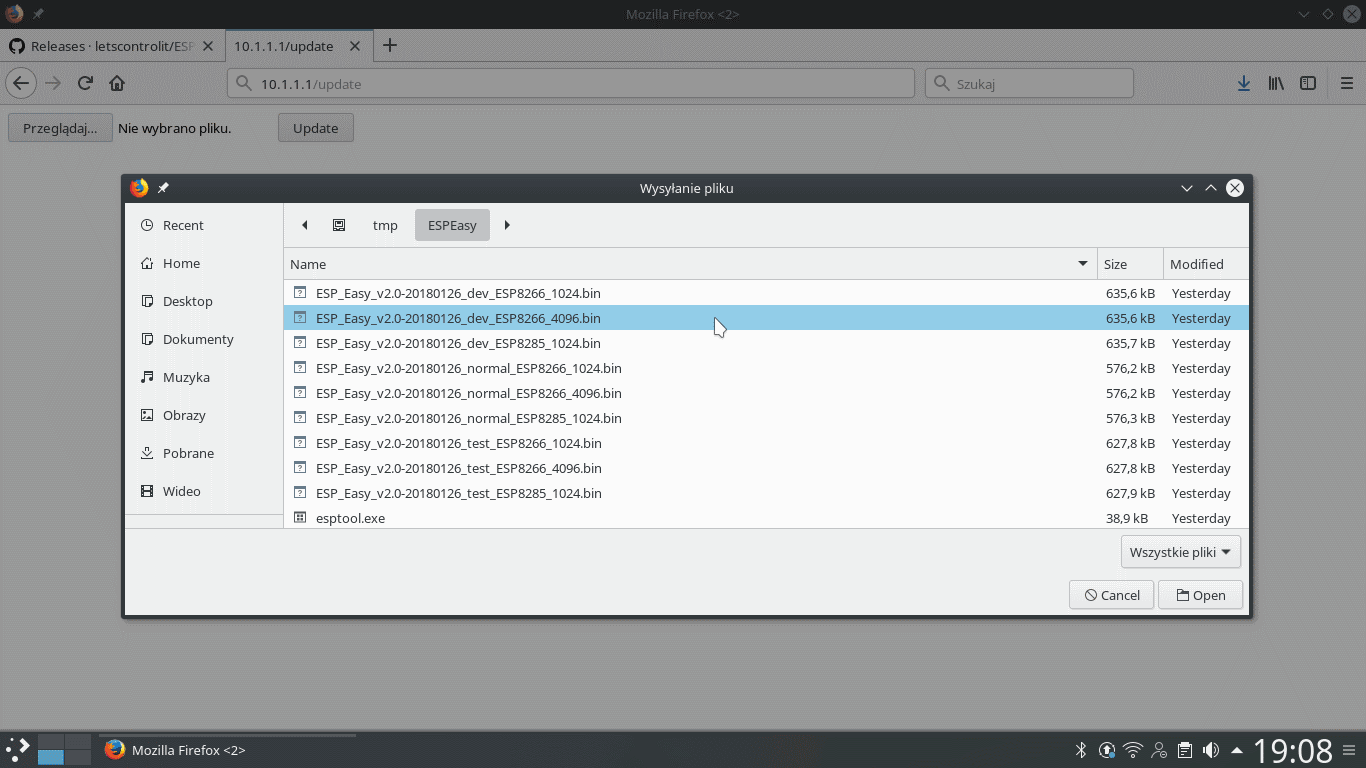
If you’ve already built the first version (or second) lets start by updating the software. Assuming you’ve got the recommended 4MB ESP version (i.e. the depicted here Wemos D1 mini) – updating the software is as easy as downloading the ZIP from pliku https://github.com/letscontrolit/ESPEasy/releases/tag/mega-20180126 unpacking and using the firmnware Update button from Tools menu of our ESP (any will do – CUBE, LoLin etc):
Let’s move to the hardware part.
Conections:
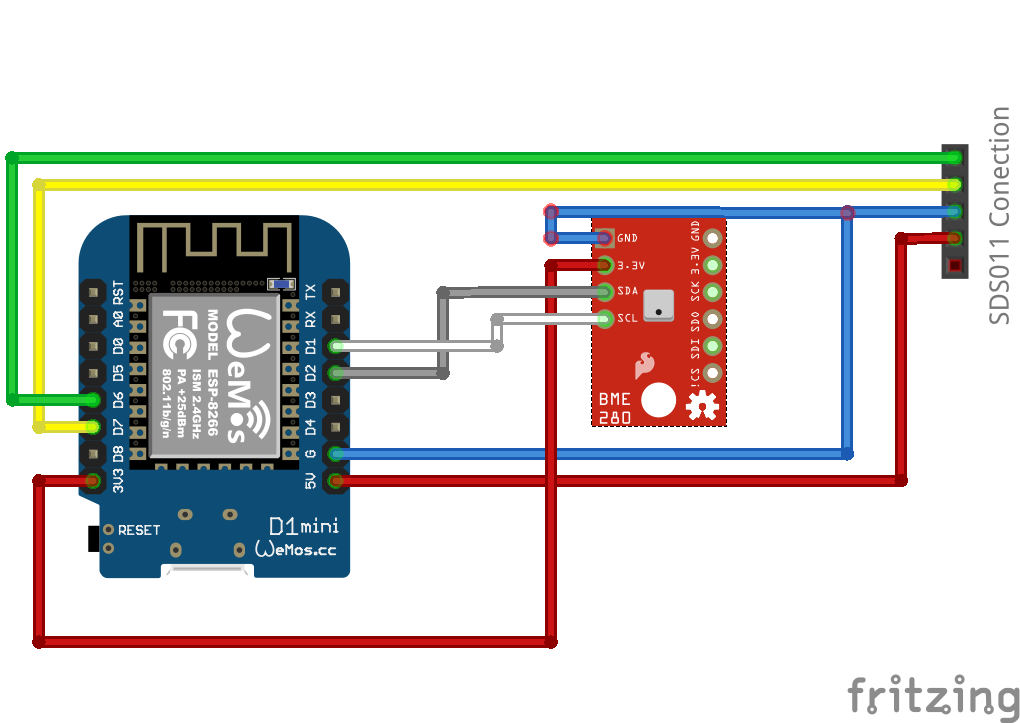
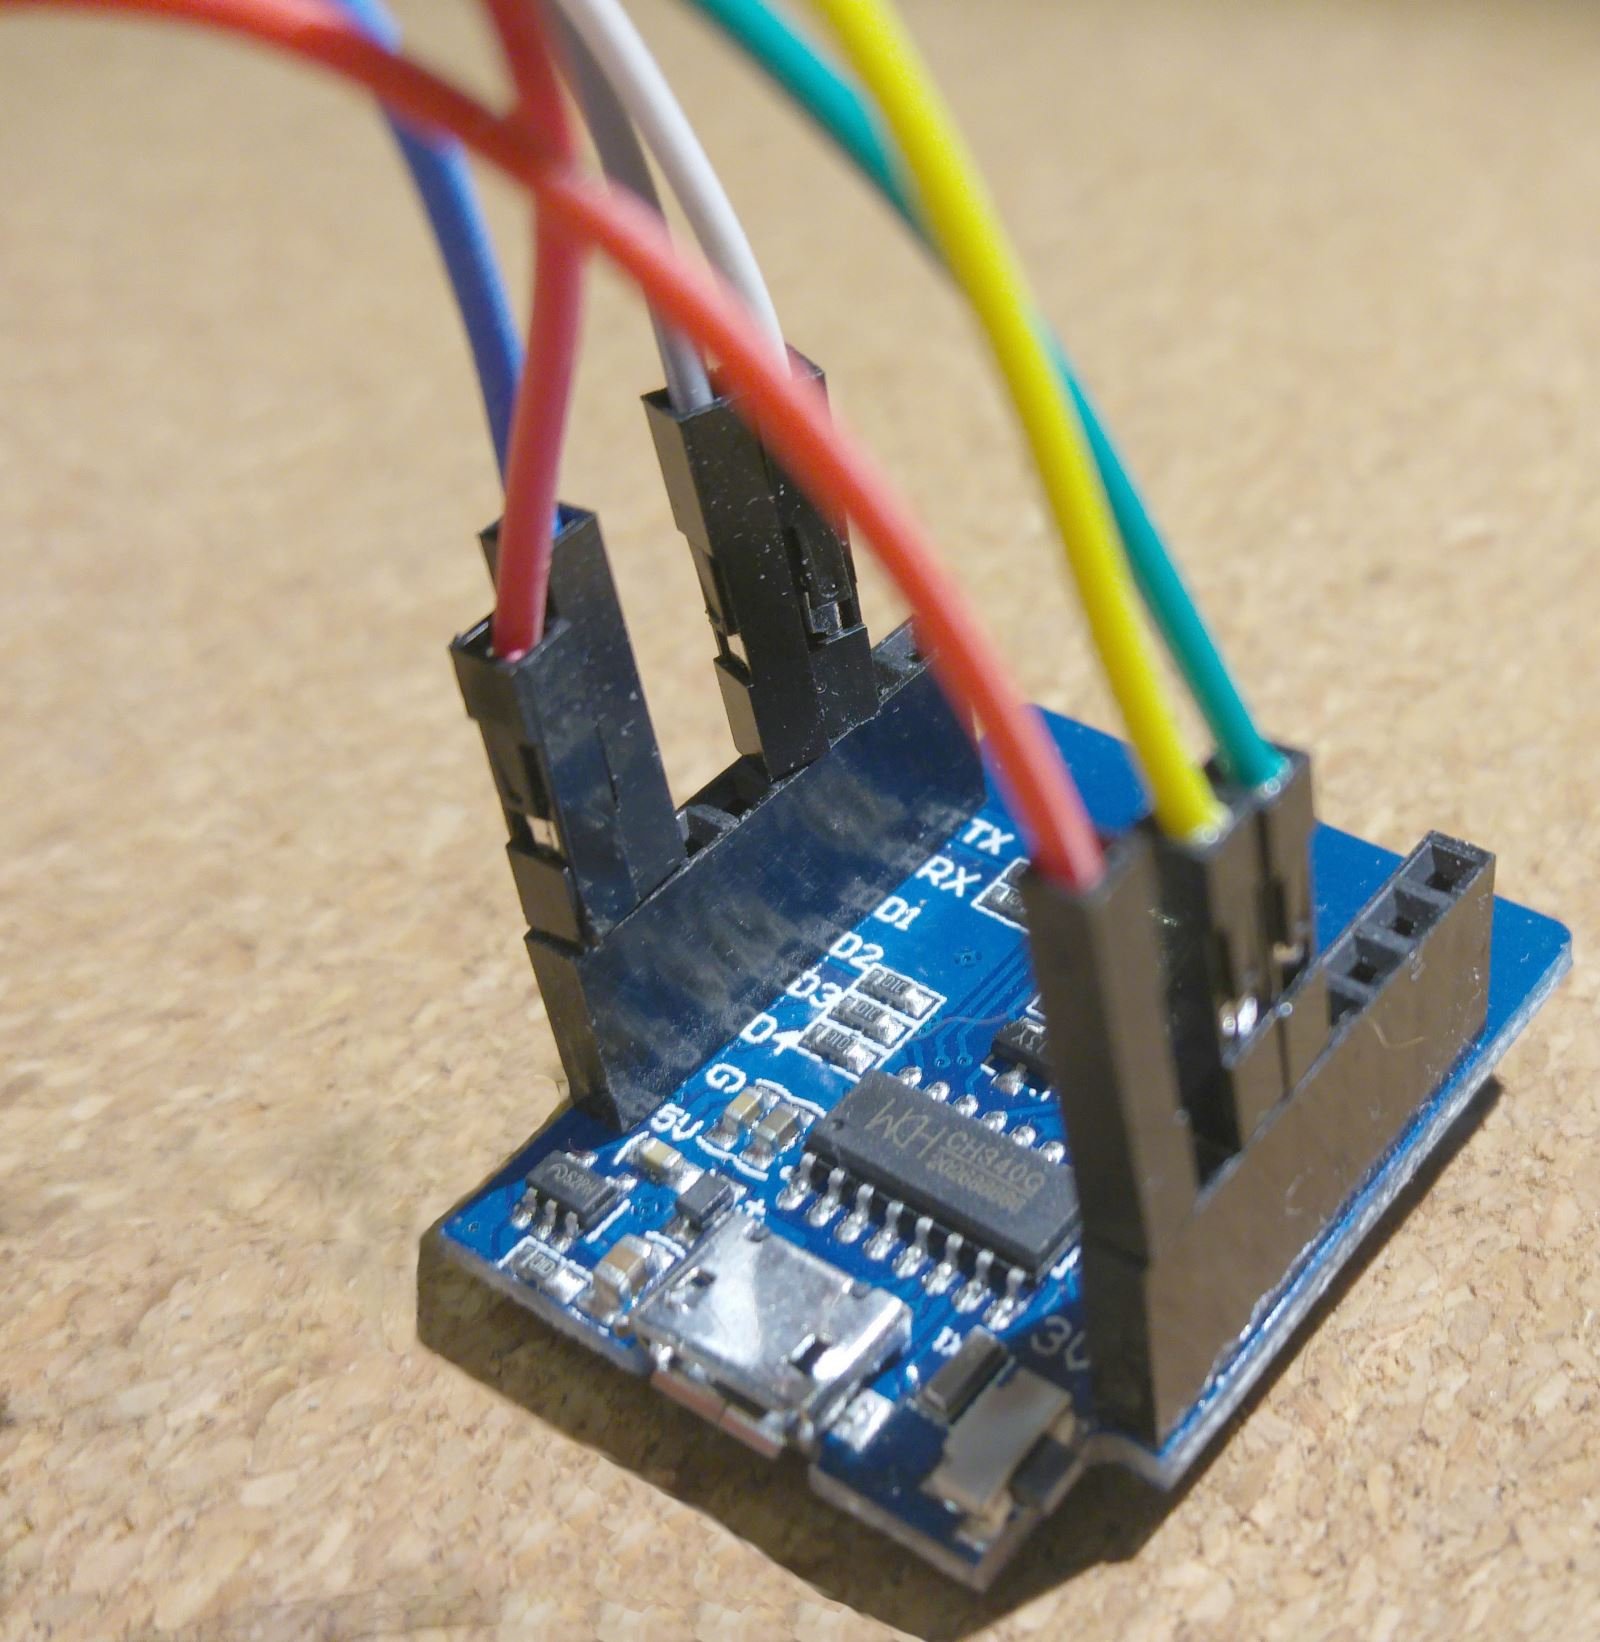
Connect the new jumper cable with the RX of the SDS011 (the green and yellow on the picture), then both TX i RX to ESP8266 – D7 and D6). Power: +5V from 5V pin and the blue cable is GND.
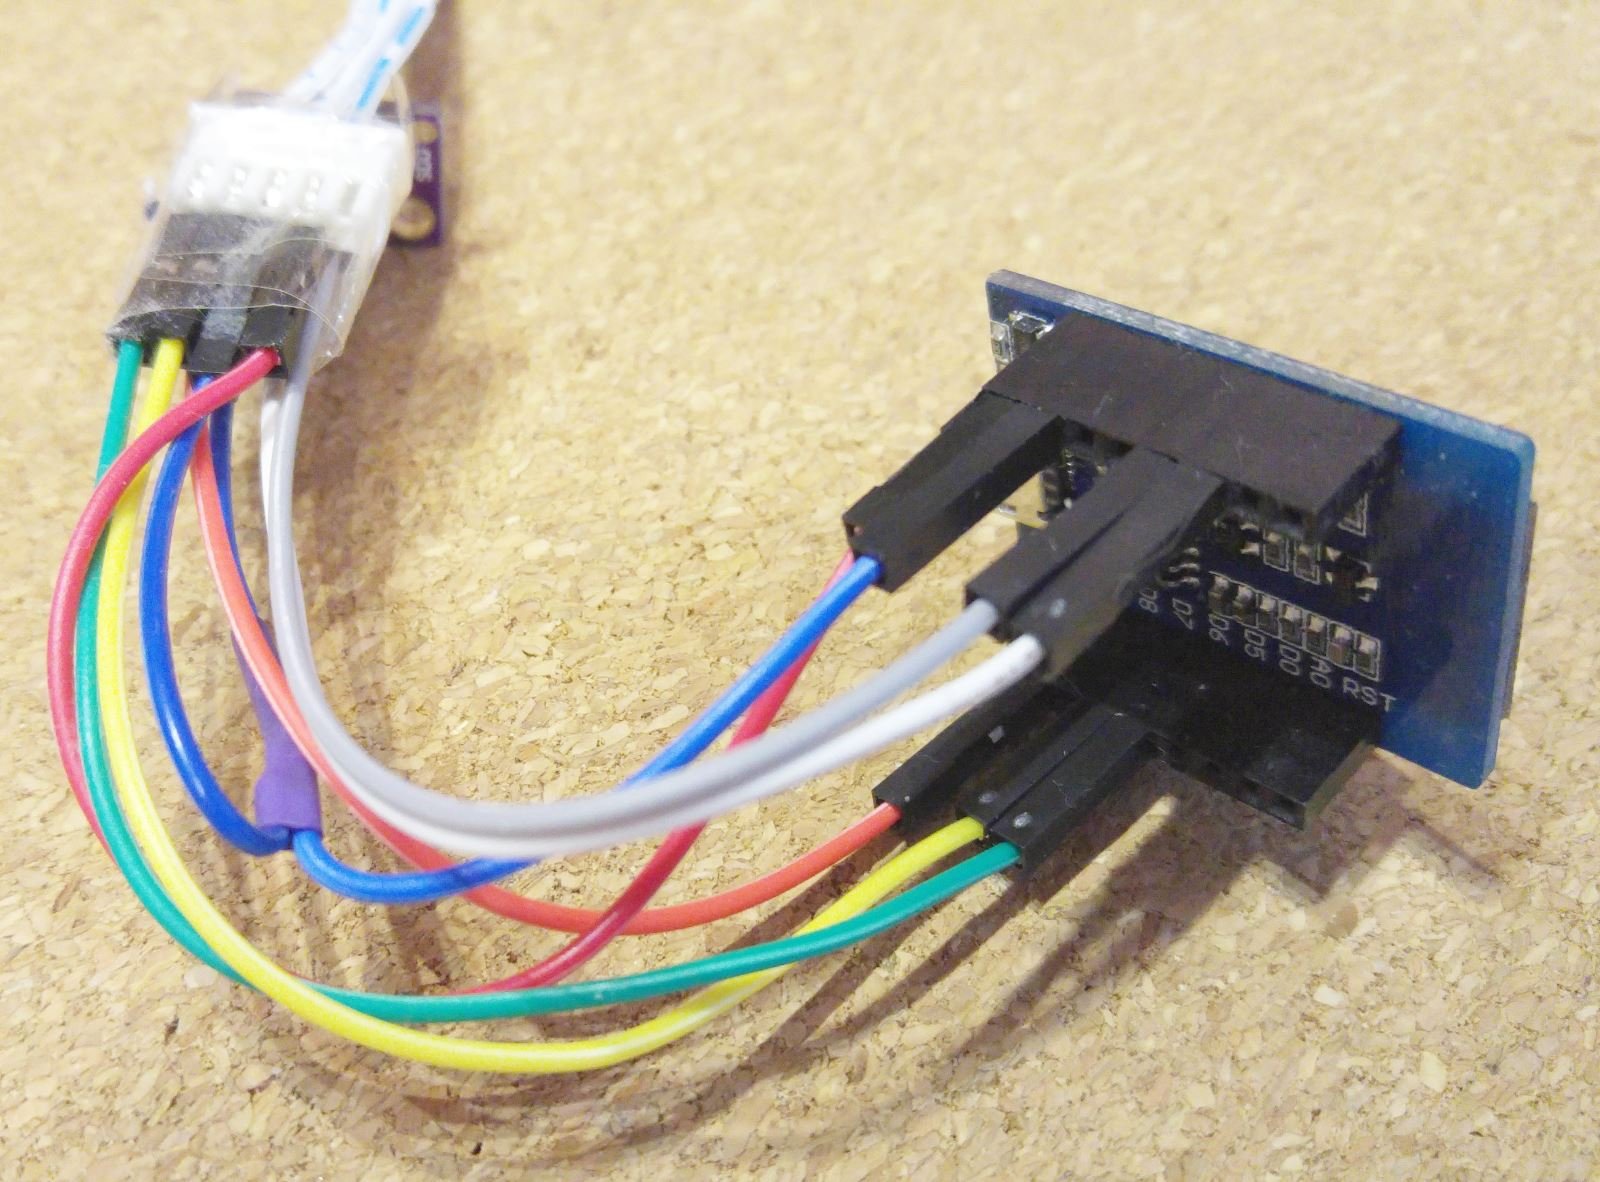
Connections from the ESP8266:
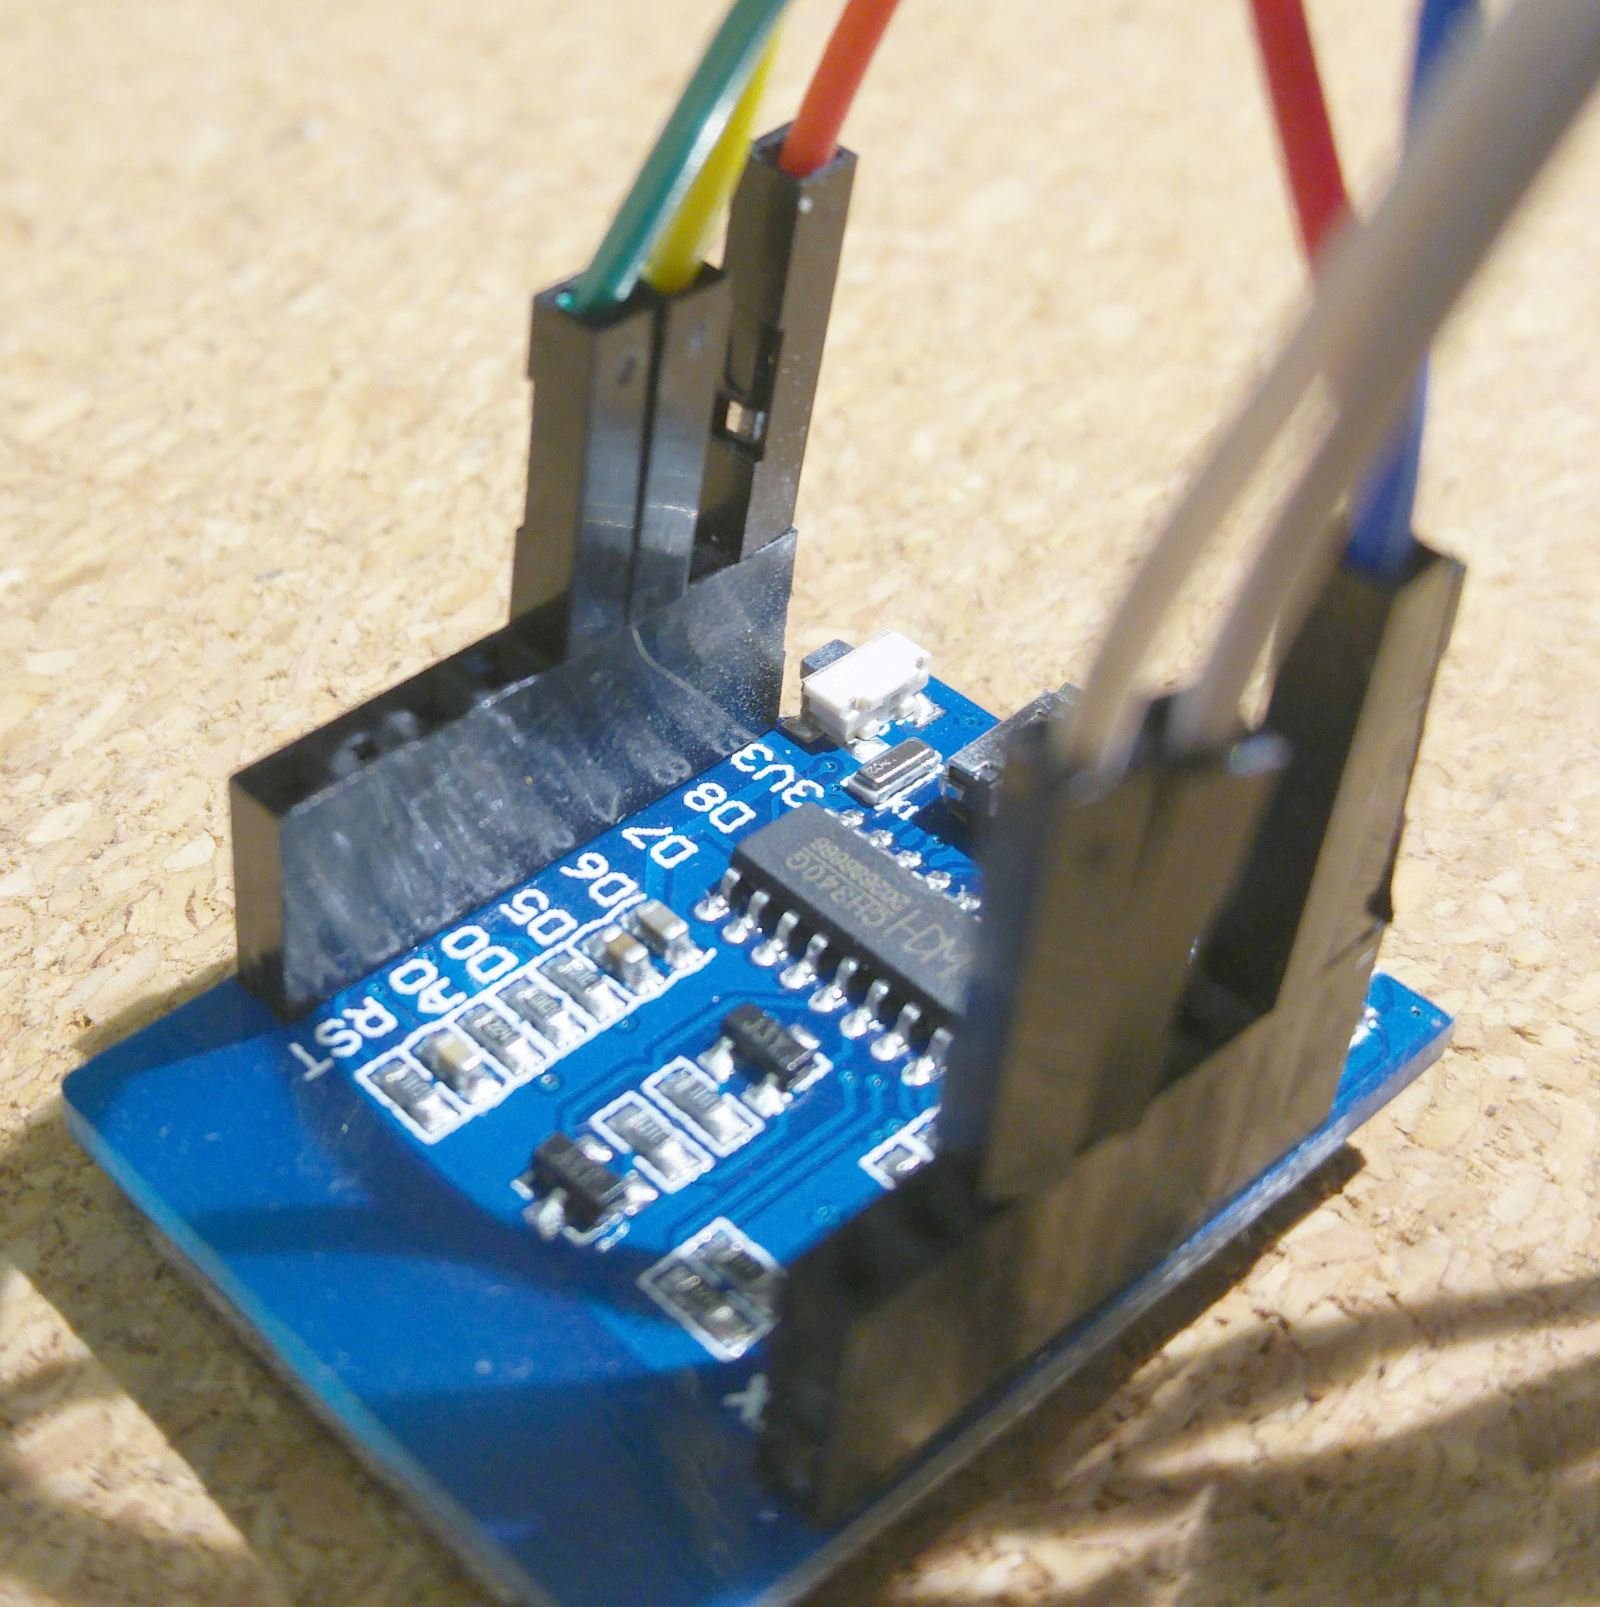
The BME280 is to be connected via white and gray cables, power from 3V pin and GND is blue again:
Let’s configure now the SDS011 – anew – do mind the new field for RX:
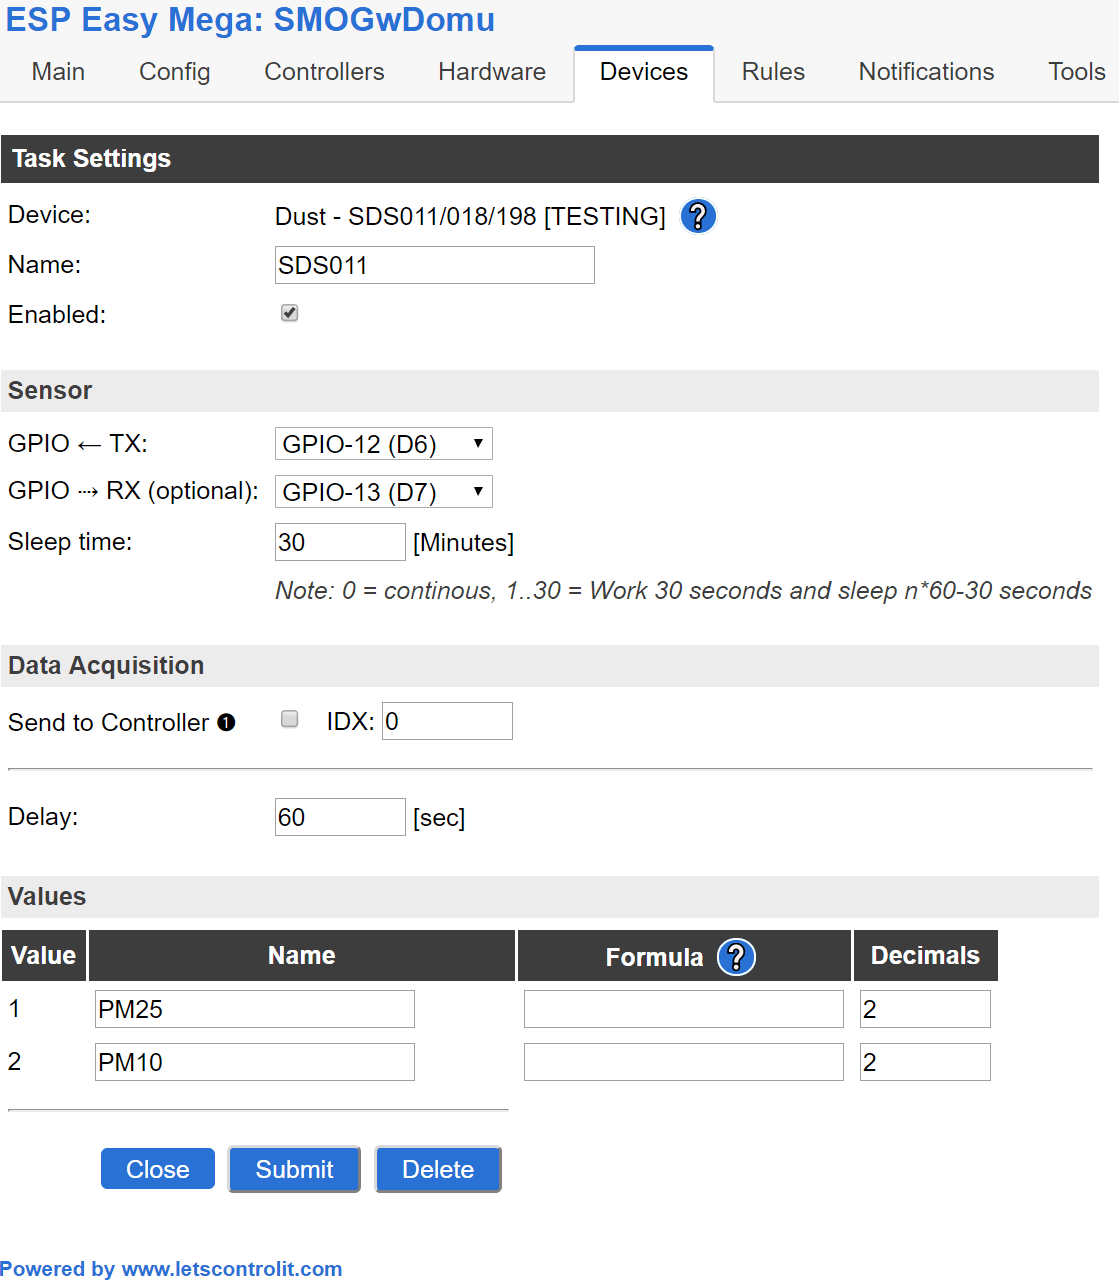
The Sleep Time: 30 means that the data will be gathered every 30 minutes (+30 seconds to spin-up). If you set it at 0 – SDS011 will work just as before in continuous mode.
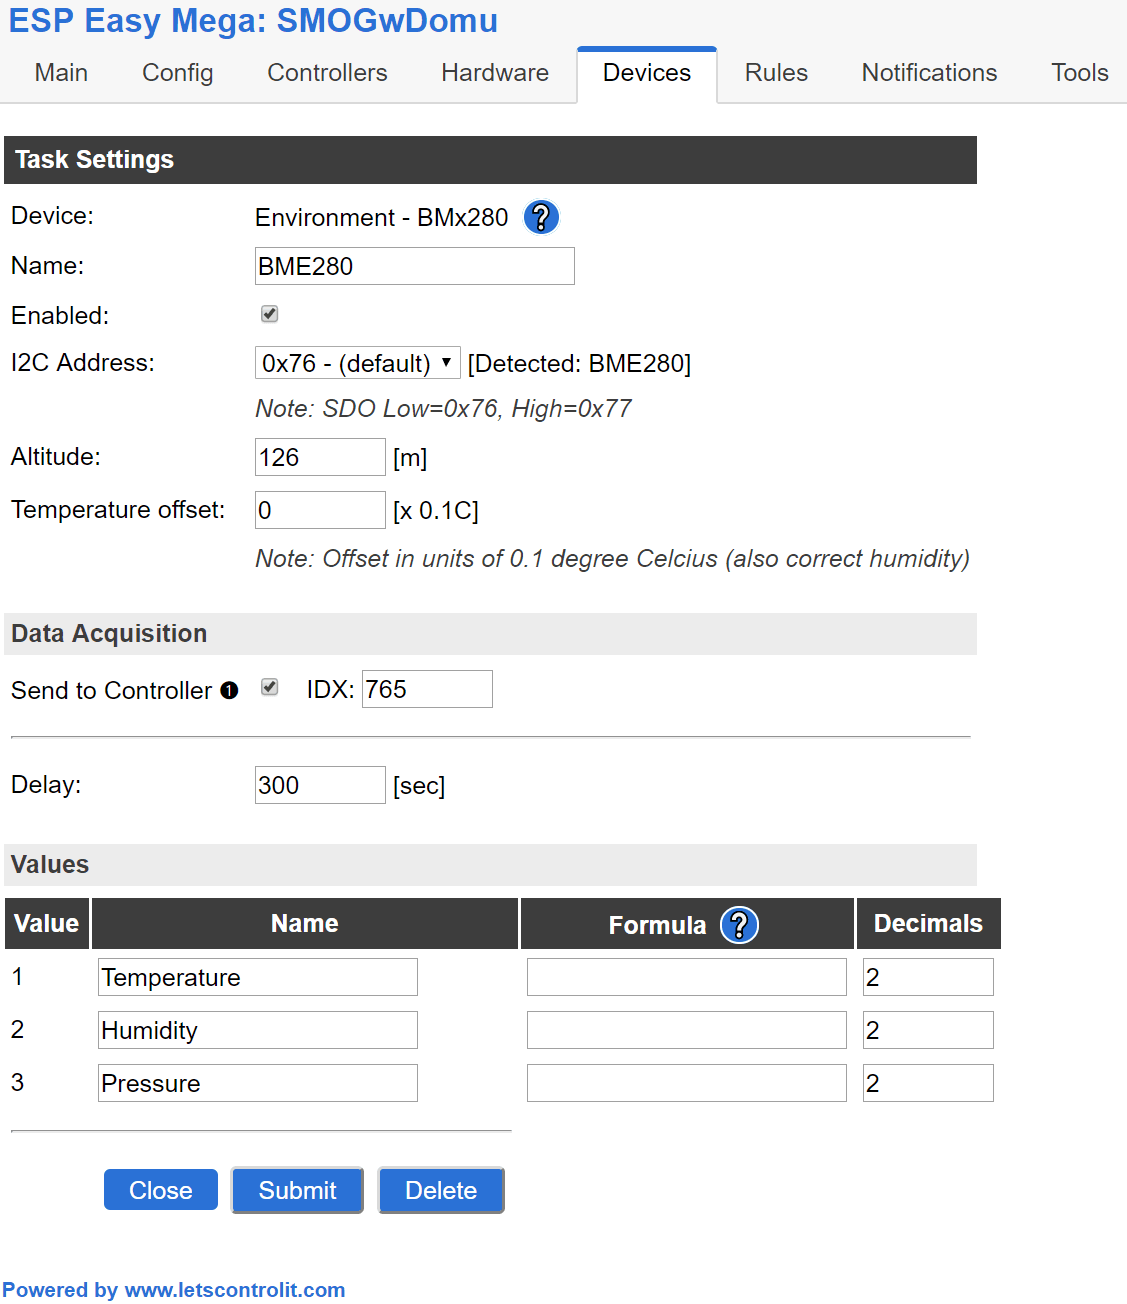
The BME280 configuration – no changes:
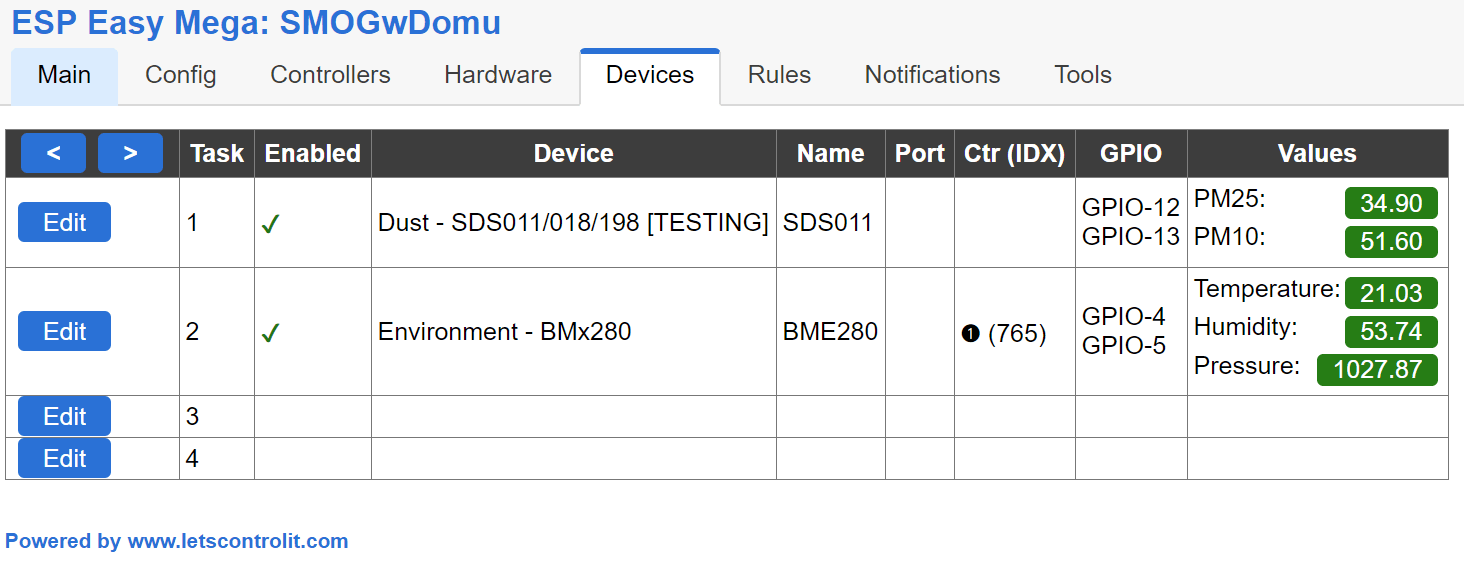
If all went well, the Domoticz address is set, we should be getting similar results:
Last but not least – let’s configure the rules to update the SMOG sensors in Domoticz. BME280 is done in classic mode.
On SDS011#PM25 do
SendToHTTP 10.1.1.1,8080,/json.htm?type=command¶m=udevice&idx=1&nvalue=0&svalue=[SDS011#PM25] //Wysylam PM2.5 do Domoticza
SendToHTTP 10.1.1.1,8080,/json.htm?type=command¶m=udevice&idx=2&nvalue=0&svalue=[SDS011#PM10] //Wysylam PM10 do Domoticza
endon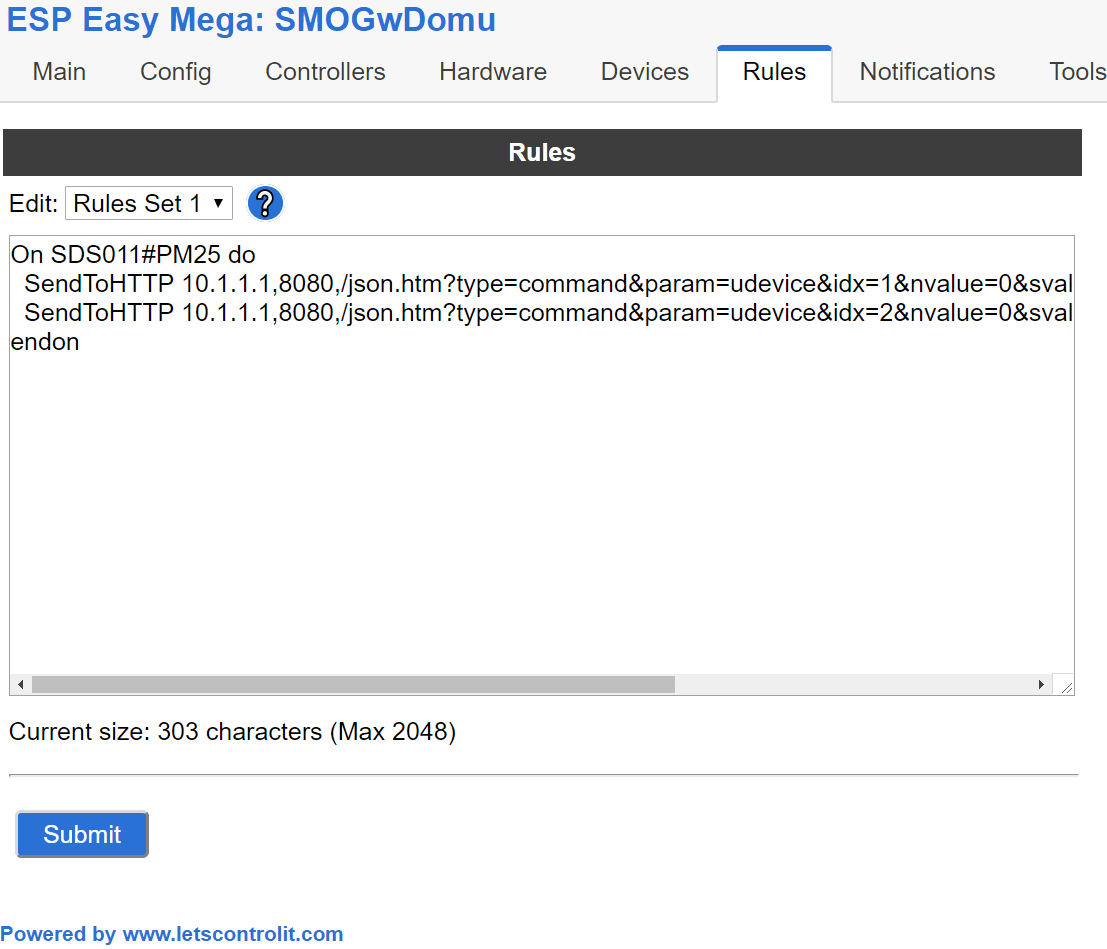
This is all. You can still use the OLED – by means of parallel connection with BME280.
Other projects
Let's see projects that viewers shared in the commet section of the previous post: those who have designed their own sensors, simplified other designs and wanted to share them. The videos are especially valuable, as they perfectly complement the written word, and often point out better some of the problems in commissioning. Grzegorz Szarzynski of "Clean Swarzedz" posted a very interestingly done practical tutorial for starting up the SDS021, please take a look:
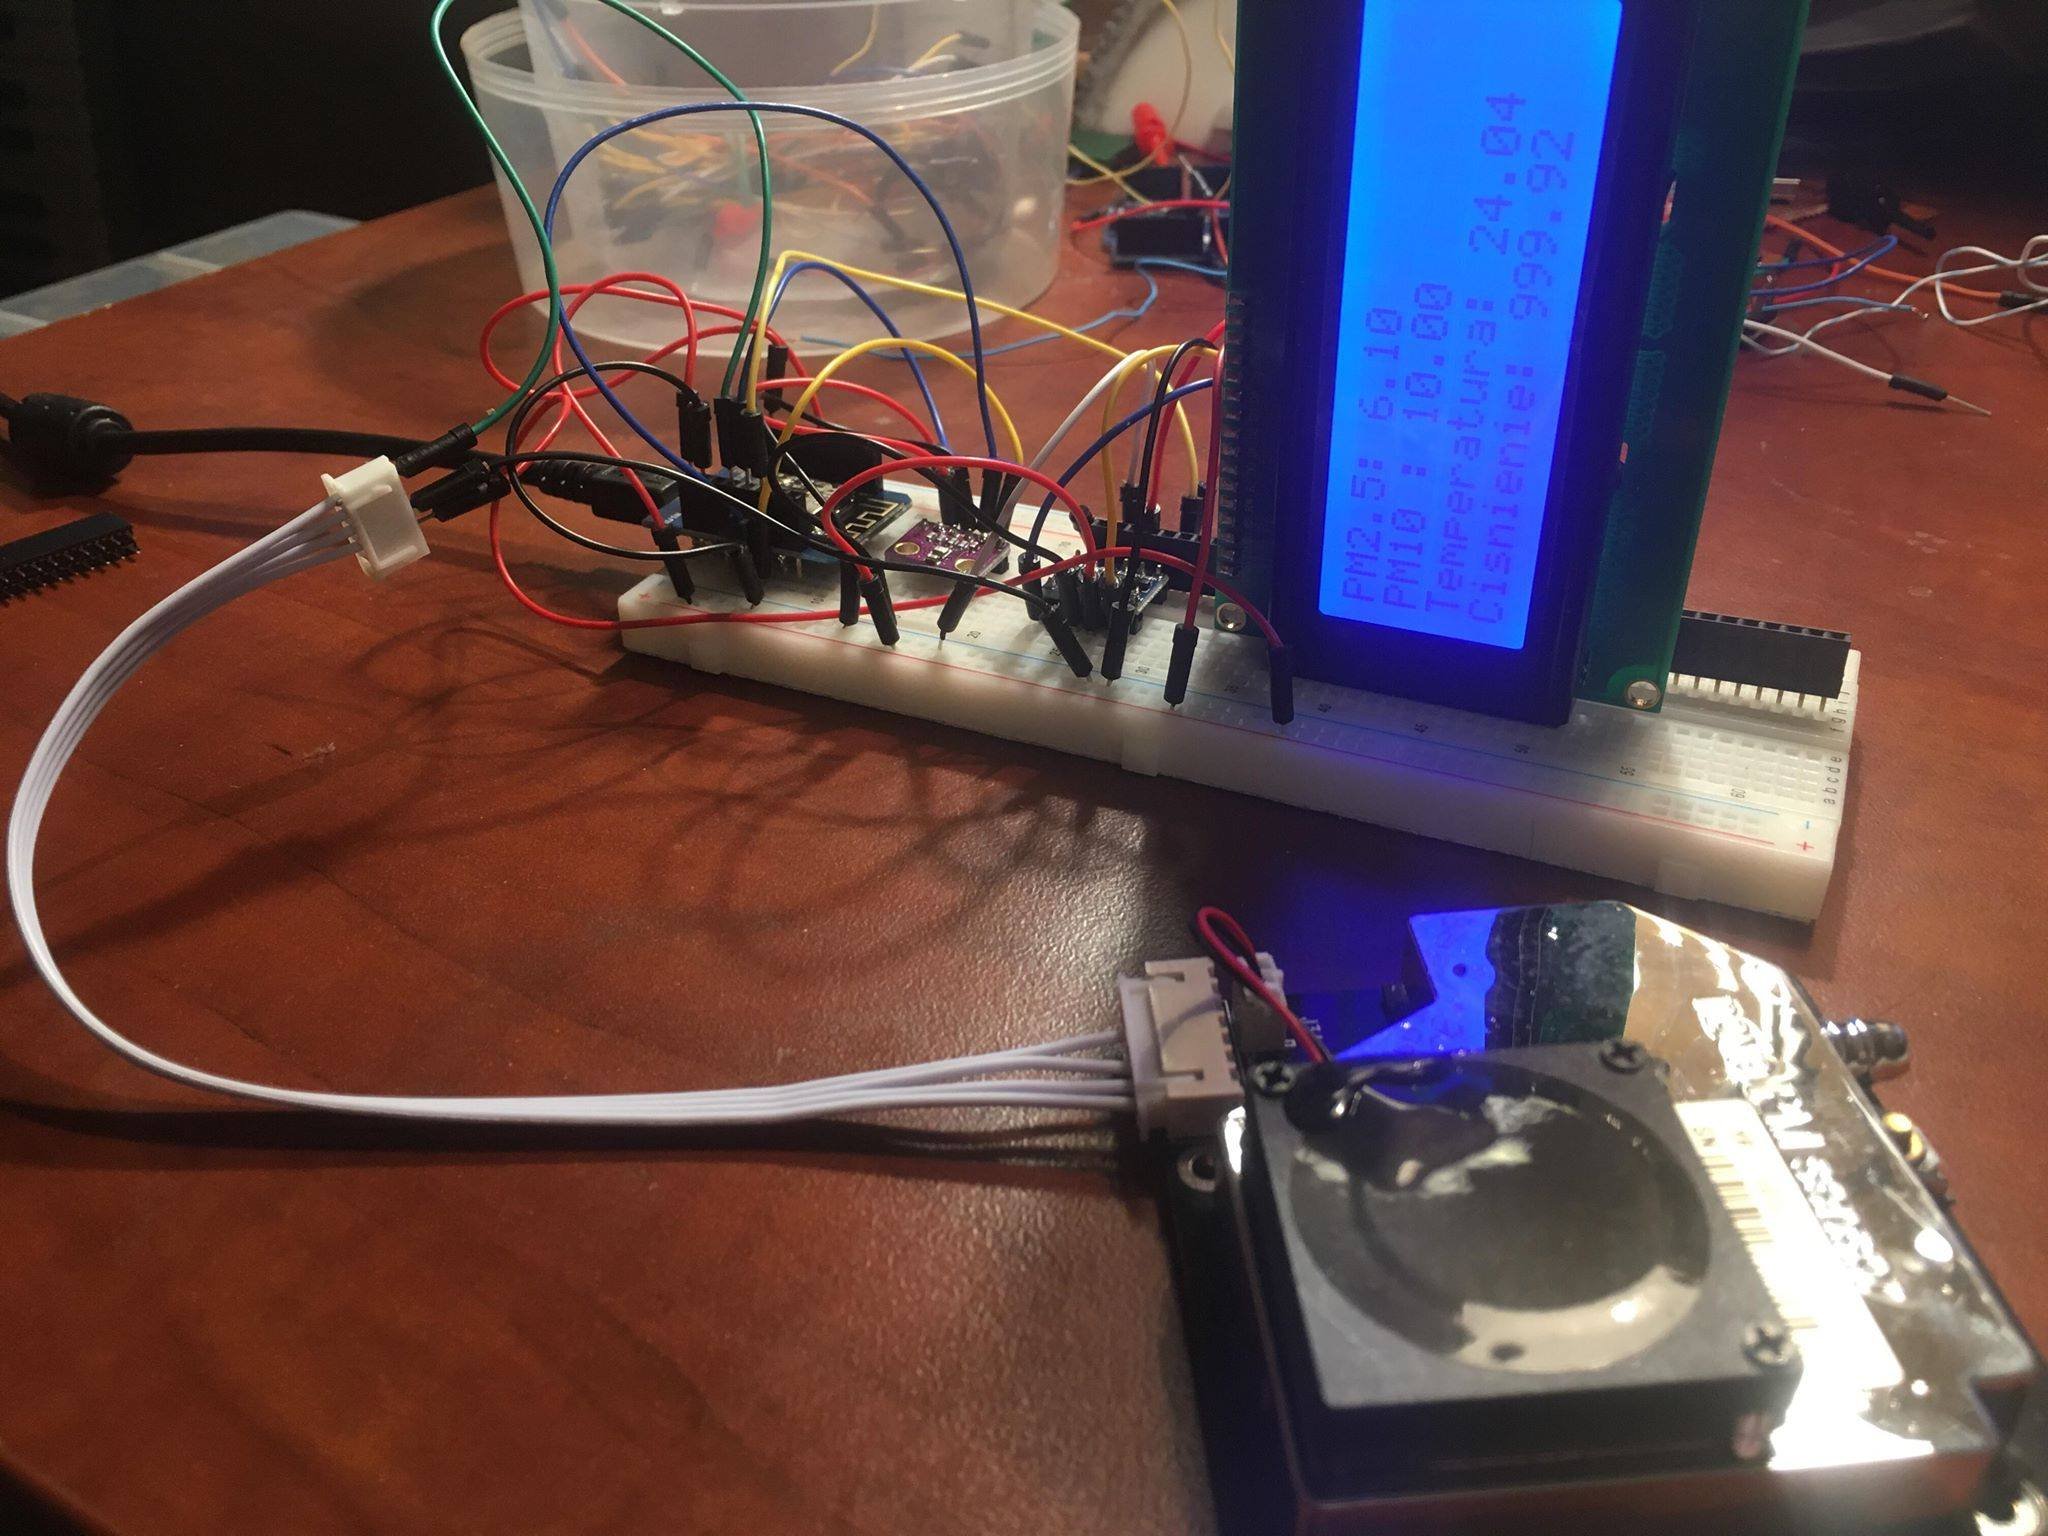
Michal Januszewski is preparing his own sensor and reporting system on the server - he launched his version of the sensor in one evening today, not forgetting the LCD2004 display logic converter:

This work is licensed under a Creative Commons Attribution-NonCommercial-NoDerivatives 4.0 International License (c) 2014-2024 Łukasz C. Jokiel, [CC BY-NC-SA 4.0 DEED](https://creativecommons.org/licenses/by-nc-sa/4.0/)